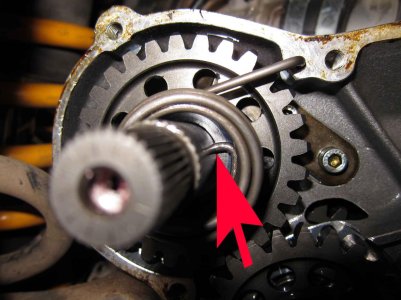
On my 2001 GG 300 engine, I'm in the process of some routine winter work like a new top end, greasing the linkage, etc. I decided to replace the starter ratchet spring, the starter ratchet, and the starter pinion - these parts are shown in the diagram on page 53 of the Workshop Manual which I obtained after looking over some posts on this site. Some of these posts mentioned the clutch needed to be removed to replace these new kickstarter parts, and I did that, and replaced the 3 kickstarter parts, and reassembled the clutch parts.
Somewhere in this process I failed to get enough tension on starter spring - that's the main spring that moves the kickstarter back. Now I've two questions for the experts.
First, what is the process of getting the proper tension on the starter spring? I do see how the starter spring inserts into the two holes, and how the notched plastic bushing works.
Second, must I remove the clutch parts again to get that proper tension on the starter spring?
All help appreciated. If my problem is dealt with in another post, please point me to that post. In a brief search, I could not find such a post. And page 63 of the Workshop Manual discusses assembling the starter pinion unit, but that didn't help me. Thanks in advance.

