2004 Gas Gas EC 250 Restoration

Ralley0895

New member
Wassup GasGas community!

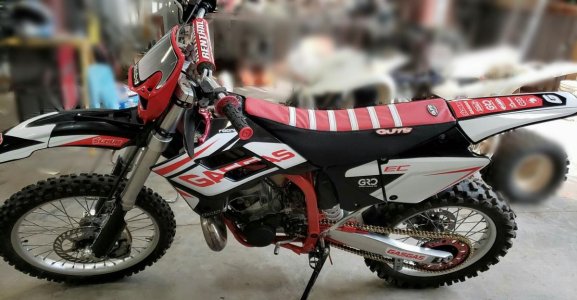
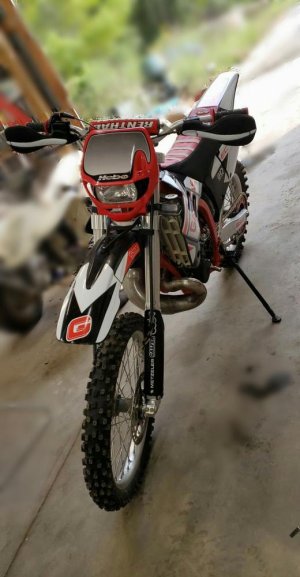
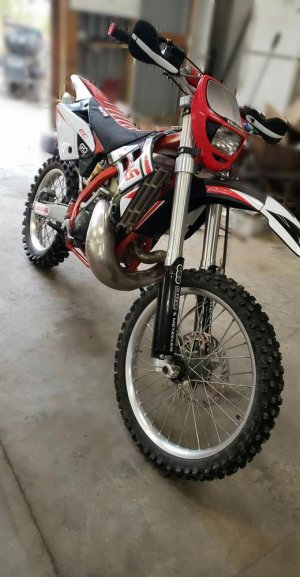
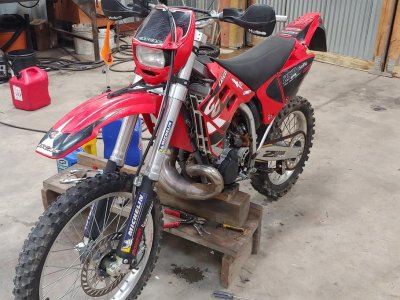
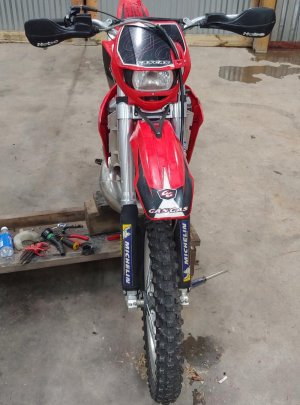
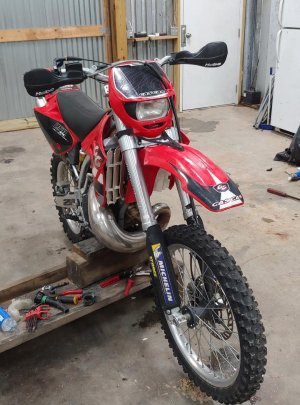
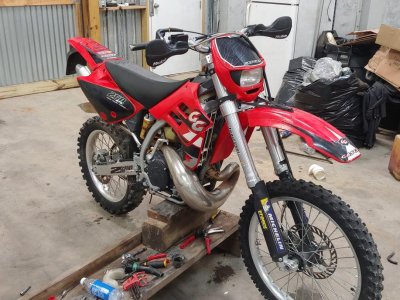
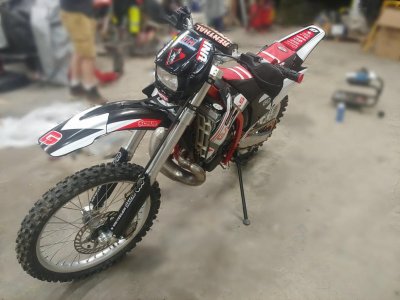
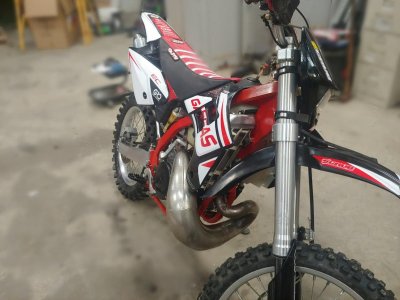
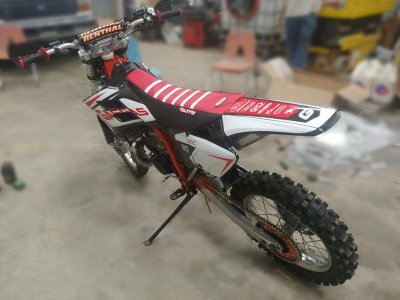
I ride a 2004 Gas Gas EC 250.

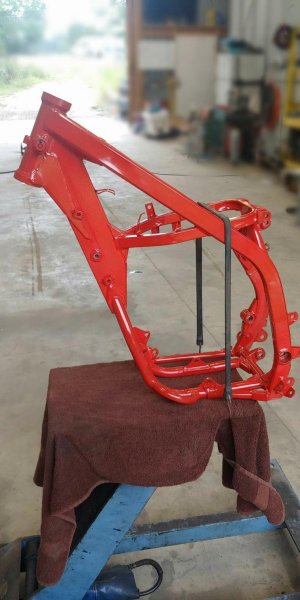
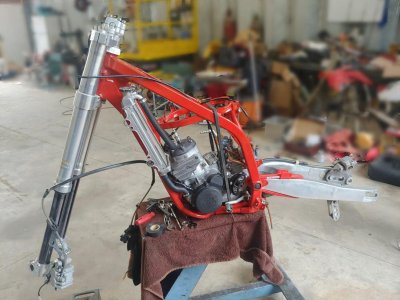
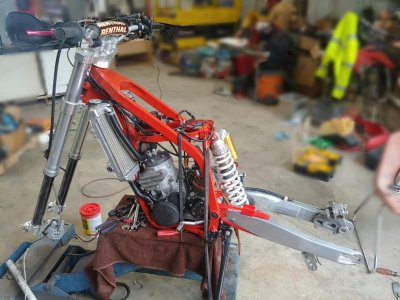
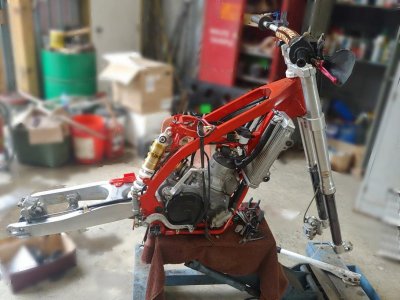
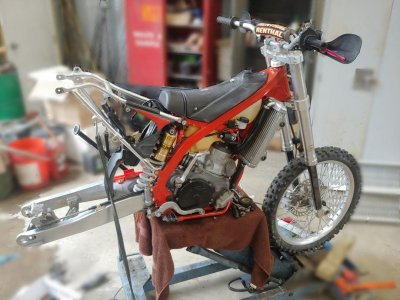
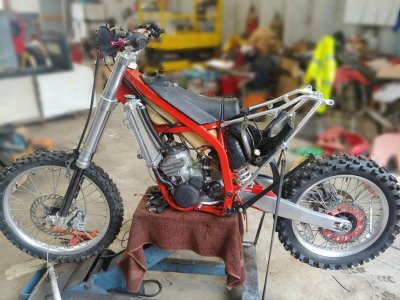
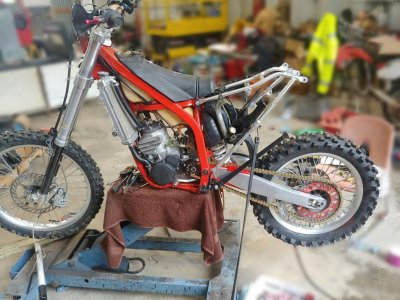
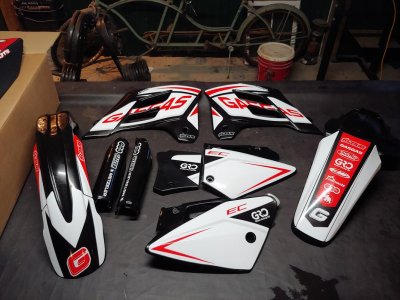
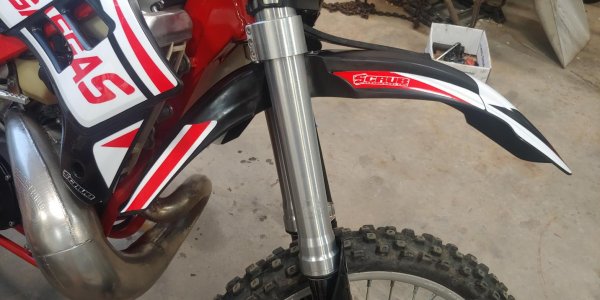
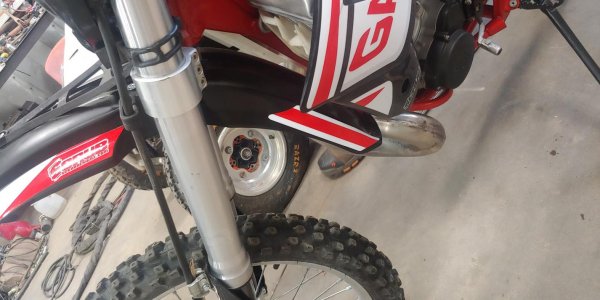
Recently I have broken my wrist due to a dirt bike accident In the time of healing up, I got bored. Sooo I decided to entirely rebuild my old bike from ground up and make it like brand new. I bought the bike in fairly decent shape but after I did my dues to it, it became quite a Frankenstein bike.

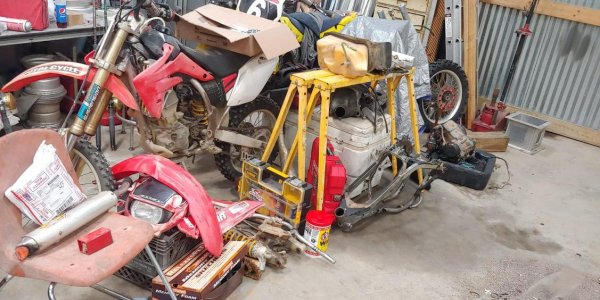
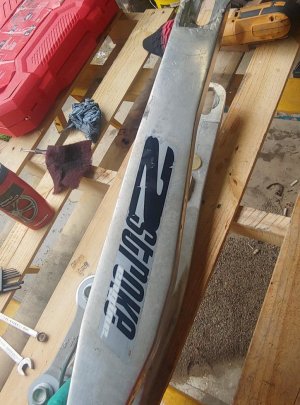
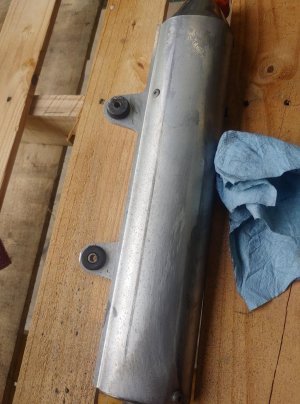
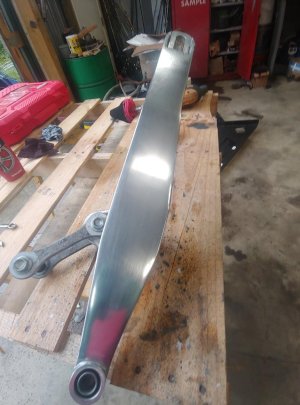
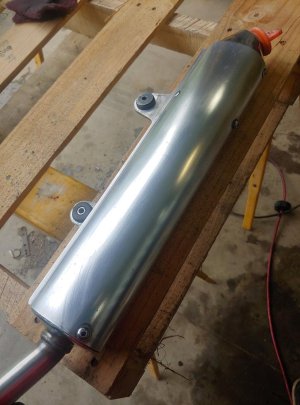
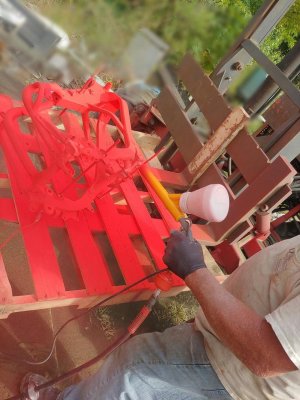
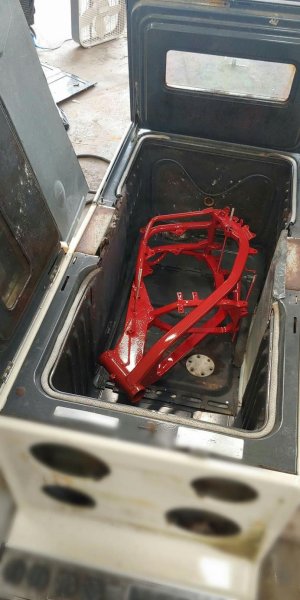
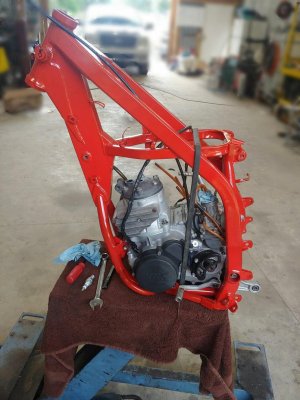
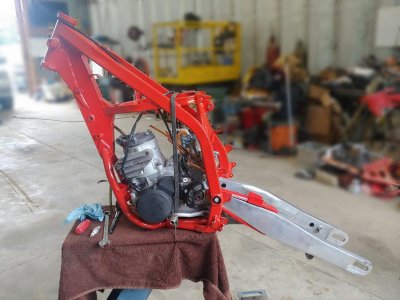
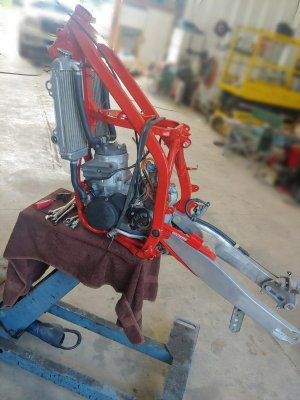
We went through the whole bike piece by piece, cleaning, painting, rebuilding, any thing and everything I could do to make it look like a brand new bike. I also had help from friends and family to make this bike possible. I am very greatful for their help.

There are plenty of photos of my restoration process if you guys would like to see.

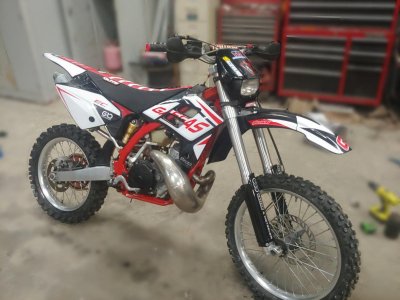
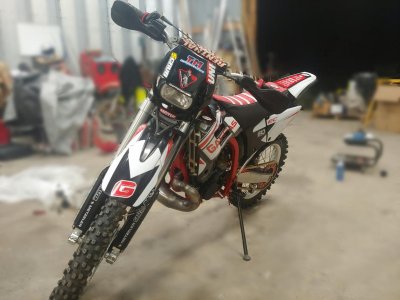
I am still in the process of perfecting the way it looks and rides. It is soooo close to being fully restored. I felt the want to share with yall my process and fun that I encountered as I rebuilt my bike to make it my own custom beautiful bike.

I really hope yall like my restoration.

There will be more post to follow as I make more improvements on the bike!

Thanks

Tripp :)
 
2004 Gas Gas EC 250

Before Restoration:
 

Attachments

  • 120568063_668438284106271_4646821689565578614_n.jpg
    120568063_668438284106271_4646821689565578614_n.jpg
    128.4 KB · Views: 83
  • 120601941_1207354619664656_3442983583252882711_n.jpg
    120601941_1207354619664656_3442983583252882711_n.jpg
    121.4 KB · Views: 66
  • 120613600_956703138145627_5503853984222318082_n.jpg
    120613600_956703138145627_5503853984222318082_n.jpg
    126.2 KB · Views: 55
  • 120658733_2443566592611964_4192656841372079373_n.jpg
    120658733_2443566592611964_4192656841372079373_n.jpg
    119.4 KB · Views: 57
  • 120724147_2413814795591913_2573006170840082485_n.jpg
    120724147_2413814795591913_2573006170840082485_n.jpg
    127.6 KB · Views: 67
Disasemble:
 

Attachments

  • 120568671_706199266651380_8317421993001941804_n.jpg
    120568671_706199266651380_8317421993001941804_n.jpg
    141.1 KB · Views: 29
  • 120582901_1059090857855146_8803672040198779650_n.jpg
    120582901_1059090857855146_8803672040198779650_n.jpg
    126.7 KB · Views: 24
  • 120700283_1337594133281032_4560957568460154318_n.jpg
    120700283_1337594133281032_4560957568460154318_n.jpg
    125 KB · Views: 30
Clean up:
 

Attachments

  • 120715570_630791970890250_481175994597795698_n.jpg
    120715570_630791970890250_481175994597795698_n.jpg
    116.2 KB · Views: 29
  • 120709080_345544833350310_2174486169895625989_n.jpg
    120709080_345544833350310_2174486169895625989_n.jpg
    117 KB · Views: 27
Powder Coating:

I powder coated the frame, spring, clutch cover, kick stand, foot pegs, chain guard and kickstand bracket.
 

Attachments

  • 120611262_1021907661615284_7339860376718520788_n.jpg
    120611262_1021907661615284_7339860376718520788_n.jpg
    121.6 KB · Views: 33
  • 120705415_3370571823000284_737121985170408196_n.jpg
    120705415_3370571823000284_737121985170408196_n.jpg
    128.7 KB · Views: 34
  • 120611051_458103115106365_4038182402137979586_n.jpg
    120611051_458103115106365_4038182402137979586_n.jpg
    124.8 KB · Views: 33
Reassembly of bike:
 

Attachments

  • 120619689_809872803113299_784278000390503728_n.jpg
    120619689_809872803113299_784278000390503728_n.jpg
    121.5 KB · Views: 31
  • 120603100_332564948029175_2684412005468834135_n.jpg
    120603100_332564948029175_2684412005468834135_n.jpg
    120.4 KB · Views: 25
  • 120540235_718838578670689_6003451036980554712_n.jpg
    120540235_718838578670689_6003451036980554712_n.jpg
    119.4 KB · Views: 24
  • 120700626_272558847138954_7459059582947631539_n.jpg
    120700626_272558847138954_7459059582947631539_n.jpg
    120.2 KB · Views: 28
  • 120702779_360720325297537_945999176750700709_n.jpg
    120702779_360720325297537_945999176750700709_n.jpg
    124.2 KB · Views: 28
Reasembly:
 

Attachments

  • 120625468_2777076732551631_7046534812727800276_n.jpg
    120625468_2777076732551631_7046534812727800276_n.jpg
    119.8 KB · Views: 31
  • 120571444_2406112493017607_6492272908226040973_n.jpg
    120571444_2406112493017607_6492272908226040973_n.jpg
    120 KB · Views: 25
  • 120702575_1024445678004588_6842721065755075328_n.jpg
    120702575_1024445678004588_6842721065755075328_n.jpg
    119.7 KB · Views: 28
  • 120653733_839978803405076_2582306356062006884_n.jpg
    120653733_839978803405076_2582306356062006884_n.jpg
    126.7 KB · Views: 35
  • 120609296_998923930607525_7604307265368945379_n.jpg
    120609296_998923930607525_7604307265368945379_n.jpg
    126.6 KB · Views: 38
New Plastics and Decals:
New Seat Cover:
:D
 

Attachments

  • 120539578_328477598437435_6316998015550940265_n.jpg
    120539578_328477598437435_6316998015550940265_n.jpg
    116.2 KB · Views: 29
  • 120464470_441177000193053_6597842640363101861_n.jpg
    120464470_441177000193053_6597842640363101861_n.jpg
    119.9 KB · Views: 44
I am awaiting a new headlight unit since mine is busted from a wreck. I wrapped vynal on it and sticker bombed it to make it look good for pictures.
 
All together:
 

Attachments

  • 120611300_337807784160459_4757522551937143726_n.jpg
    120611300_337807784160459_4757522551937143726_n.jpg
    112.5 KB · Views: 84
  • 120540420_397880684945547_2986983218216170949_n.jpg
    120540420_397880684945547_2986983218216170949_n.jpg
    111.7 KB · Views: 49
  • 120600937_256422815688355_6014386488665233237_n.jpg
    120600937_256422815688355_6014386488665233237_n.jpg
    109.1 KB · Views: 49
  • 120602213_461441574824741_912455176659760791_n.jpg
    120602213_461441574824741_912455176659760791_n.jpg
    114.7 KB · Views: 46
  • 120621949_737882316792391_9027752931332395052_n.jpg
    120621949_737882316792391_9027752931332395052_n.jpg
    108.8 KB · Views: 41
All together #2:
 

Attachments

  • 120605198_338686907237013_245038315944799216_n.jpg
    120605198_338686907237013_245038315944799216_n.jpg
    113.7 KB · Views: 12
  • 120704346_658991208088654_2355748079288922205_n.jpg
    120704346_658991208088654_2355748079288922205_n.jpg
    115 KB · Views: 11
  • 120760234_340642817178164_7915681910409014103_n.jpg
    120760234_340642817178164_7915681910409014103_n.jpg
    109.1 KB · Views: 13
Added some custom stickers to the hand guards:
 

Attachments

  • 120659254_330616904695230_7267793386207933316_n.jpg
    120659254_330616904695230_7267793386207933316_n.jpg
    124.8 KB · Views: 15
Added sticker to the swing arm:
Added custom sticker to back of front fender:
 

Attachments

  • 120627929_467318664226592_5810822435138532083_n.jpg
    120627929_467318664226592_5810822435138532083_n.jpg
    117.7 KB · Views: 37
  • 120702575_4099338650082962_8905139280382339923_n.jpg
    120702575_4099338650082962_8905139280382339923_n.jpg
    127.4 KB · Views: 19
  • 120705616_697792571083316_5952400258498909315_n.jpg
    120705616_697792571083316_5952400258498909315_n.jpg
    128.4 KB · Views: 16
This is as far as I am today. I will be uploading more picture as it progresses into a more beautiful bike each day! I hope yall like and enjoy my post! If yall have any questions, comments, or concerns. Feel free to ask me! :)
 
Looks really good. Well done.

These older GG's are still great bikes, well worth the effort to keep them running. I got my '01 XC 200 out of moth balls the other day, after leaving it sit for 18 months. It fired right up & ran great. Where I live & ride, a plated 4T get ridden more often. In my case that's '17 FE 250 Husky. But I definitely need to plan a off road ride somewhere so I can ride the unplated GG again.

Thanks for posting. Hope the wrist heals up OK.

RB
 
My head light unit came in! 😁 
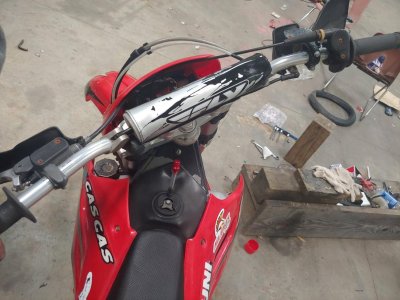
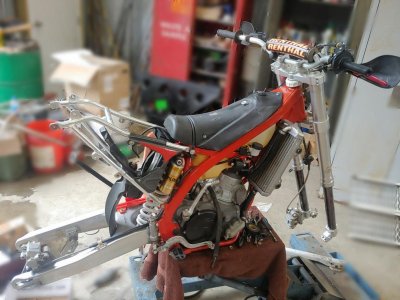
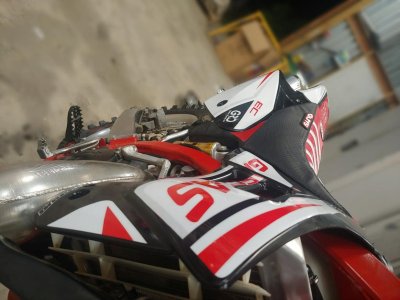
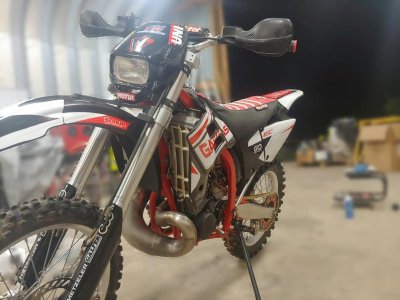
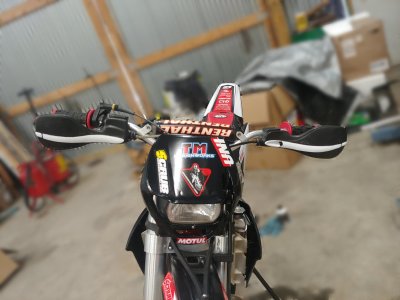
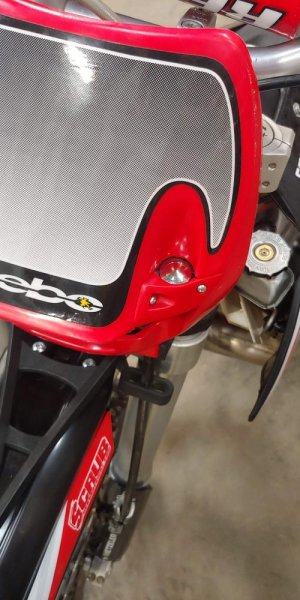
I have to figure how to match the decaling with the rest of the dirtbike and put it on. I am so excited! Any ideas on the way my decal on my head light could look? The plastic is red now, due to a order mix up. I can wrap it in black vynal though.
 
Added a new chest pad and the new head light unit! 😁
 

Attachments

  • aviary-image-1601855082244.jpg
    aviary-image-1601855082244.jpg
    110.2 KB · Views: 32
  • aviary-image-1601855247523.jpg
    aviary-image-1601855247523.jpg
    61.3 KB · Views: 31
  • aviary-image-1601855384271.jpg
    aviary-image-1601855384271.jpg
    76.9 KB · Views: 30
Added new kill switch and light switch due to both not working anymore. Kill switch might be just a temporary fix.
 

Attachments

  • received_416127026049186.jpg
    received_416127026049186.jpg
    93.7 KB · Views: 28
  • received_3354881581292202.jpg
    received_3354881581292202.jpg
    41.1 KB · Views: 33
Back
Top