2018 tech tips and tricks.

gasgasman

Super Moderator
Staff member
Figured I would get this going.
Enough 2018 GasGas' out there for a one stop tech tips and tricks location.
Please add your experiences.

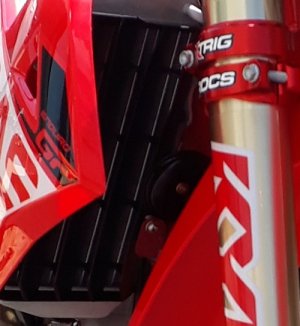
I just add the X-Trig preload adjuster to my '18. Works really well.
The YZ part fit right up with no issues at all. 07-09 YZ250F/450

XTrig part # 10200002

30743349_2156049657746167_7118294252071311236_n.jpg


31052187_2156049874412812_4530409166829152783_n.jpg


31100551_2156049571079509_8733160623118333868_n.jpg


30762896_2156049977746135_551516140870070069_n.jpg
 
Last edited:
Shove some foam in your tank bolt hole to prevent it from filling with mud.
bff8e396a71d488a83bca57c5606b35b.jpg


Be sure to monitor the sub-frame bolts, they tend to loosen up.

The clutch cover is paper thin and will crack on the slightest hit. Rekluse makes a nice replacement that comes with a different brake pedal tip too.
566465270c88a2c14953b2526a0c5f2d.jpg


Larger battery cables will solve your starting problems.

The SXS skid plate for these bikes is sweet!
9182d6963170f69fbde8c83fe0554666.jpg


Be sure to check your spokes for the first 10-15 hours. I have tightened mine 3-4 times now.


Sent from my iPhone using Tapatalk
 
I just add the X-Trig preload adjuster to my '18. Works really well.
The YZ part fit right up with no issues at all.

Any chance you can let us in on what part # that is? There are four different Yamaha parts on the Xtrig website.
 
Auto retract side stand delete.

Use KTM bushing (part #78003023080) and bolt (part #0019080266S)
The bolt will need to have the threads extended another 5mm.
The bushing does come with the necessary o-rings.
23031340_1911515035532965_3534952154767912235_n.jpg
 
Last edited:
This applies to the '18 bikes also.
Tech tip.
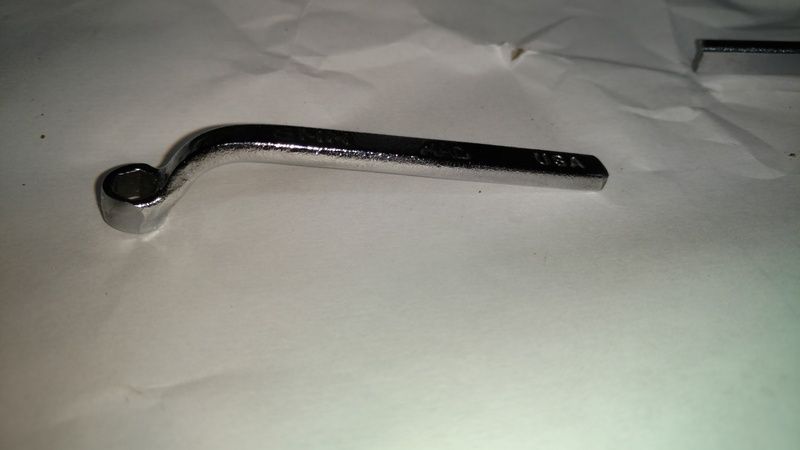
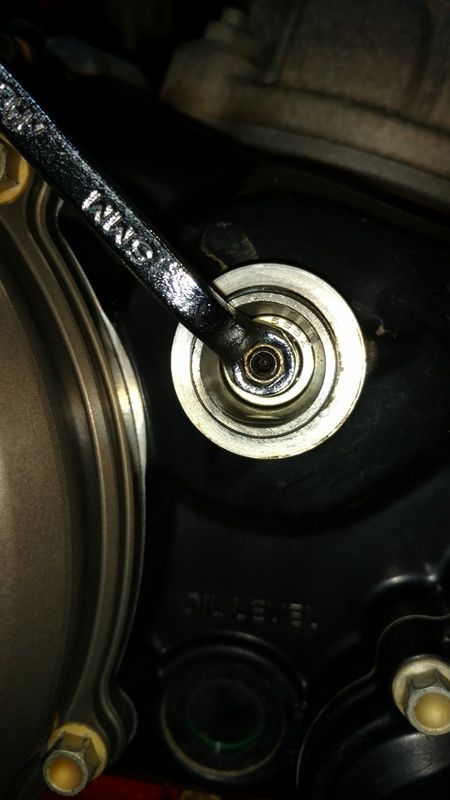
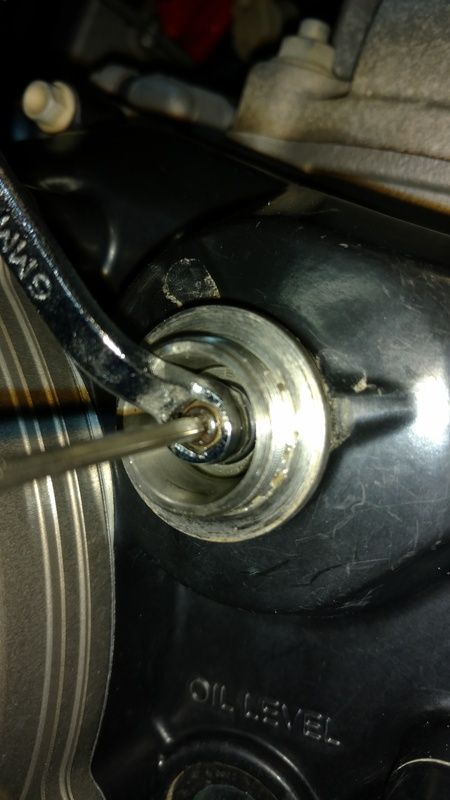
Issue: How to tighten lock nut on power valve adjuster.
Solution: Purchase a MAC Tools S166 (6mm+7mm) brake bleeder wrench.
Cut the wrench to 3" total length to clear the pipe and clutch cover. Use the 6mm end for the adjuster nut.

s-l300.jpg


IMG_20170403_203350246_zpsvxbmybfd.jpg


IMG_20170403_203626963_zps5jtxbbse.jpg


IMG_20170403_203651487_zps58kmtdue.jpg
 
Glad I asked! I would have assumed part # 10200005 since it fits the Yamaha 2018 bikes. I see the 10200002 part is for the 07-09 bikes. I wonder why that is?
Worthwile Mod?

The shock body determines what preload adjuster you need.
The GasGas' have the 48mm body.

It's worth it in my opinion. Using a punch was a tedious process and beats the crap out of the adjuster rings.
Shock does not need to be disassembled, or need a spring compressor.
Just back the preload adjuster rings all the way loose.

https://dirtbiketest.com/product-tests/xtrig-pre-load-adjuster/#SRJMaVKLRdLybYKF.97

https://mx-tech.com/content/X-Trig%20PLA%20Instructions.pdf
 
What gauge wire did you use to rewire the ground on the starter?

Also, another tip is use a dremel and ruler to grind some chain adjustment notches into the swingarm for easier chain adjustments.
 
I used 10 guage wire.
I crimped the terminal end on the wire, put some liquid electrical tape on the joint, then heat shrinked the connection.

I cut the front mounting point off on the plastic cover. That way I would get a better grounding point.
30415664_10212014386816527_724667562448650240_n.jpg


A zip tie was used on the front for good measure.
30581494_10212014400816877_1029472105726476288_n.jpg
 
Last edited:
I used 10 guage wire.

I crimped the terminal end on the wire, put some liquid electrical tape on the joint, then heat shrinked the connection.


I cut the front mounting point off on the plastic cover. That way I would get a better grounding point.

30415664_10212014386816527_724667562448650240_n.jpg


A zip tie was used on the fron for good measure.

30581494_10212014400816877_1029472105726476288_n.jpg


I pitched the plastic cover in the bin. It was just a mud catcher.

Also when I got my CDI back from being reprogrammed, the dealer had given me a larger diameter positive battery cable too. I’m not sure if it was the CDI or the new cable that made the huge difference but the bike will cold start in gear now. Starting is flawless.


Sent from my iPhone using Tapatalk
 
Also when I got my CDI back from being reprogrammed, the dealer had given me a larger diameter positive battery cable too. I?m not sure if it was the CDI or the new cable that made the huge difference but the bike will cold start in gear now. Starting is flawless.


Sent from my iPhone using Tapatalk

My 2018 had the re-flashed CDI box and larger battery cable when I purchased it a couple of weeks ago. I have not had one issue with starting, cold, hot, in gear, etc. About 8 hours on the bike now.

As someone who had always poked fun at riders who want e-starts on their two-strokes, I am ashamed to admit I have not used the kick start once.
 
I replaced the stupid phillips head screws with Allen heads on top of the carburetor. M4 x.7 x 12mm. Picked them up at Ace Hardware for .95 cents each.
 
This was posted on FaceBook.
Reposted with permission.

My buddy Chris Evans and his recent bad luck with a cracked clutch cover, served me as a good reminder to share this tip with everyone here. Regardless of the year model, check your rear brake pedal to see if you can get a little more clearnace between the pedal tip and case.

Before you start grinding though, start by simply loosening up the 2 allen bolts that attach the tip to the brake lever, push the tip away from the case, then re-tighten the bolts. Then you can see what you need to modify. Depending on year model, this might be the only thing you need to do.

Pedal too close to clutch cover.
34159335_1970478899630604_1682961795108569088_n.jpg


In stock form, you can see how the brake pedal tip is cocked sideways. A simple fall over in a rock garden will force the pedal tip into the clutch cover.

34188974_1970478926297268_1250458034350587904_n.jpg


Note how I have ground away the sharp edges. Also, I had to grind away the edge of the tip, (see where I am pointing?) This allowed the tip to be bevel with the brake lever when I reassembled. In other words, the tip isn't overhanging the pedal now..
34342293_1970478949630599_7460792079338176512_n.jpg


See the difference? Next step is to replace the allen head bolts, with 2 hex head bolts. See how the allens are sticking up, and close to the case? The hex heads will allow a bit more clearance.
34268911_1970479029630591_5139874649743556608_n.jpg
 
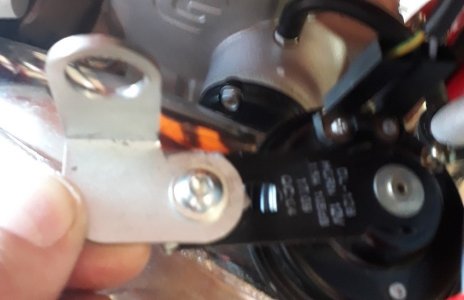
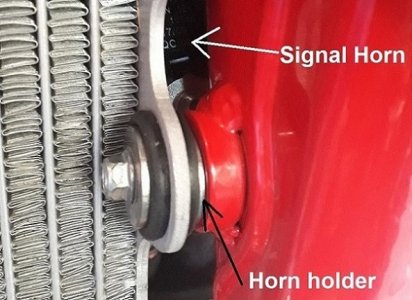
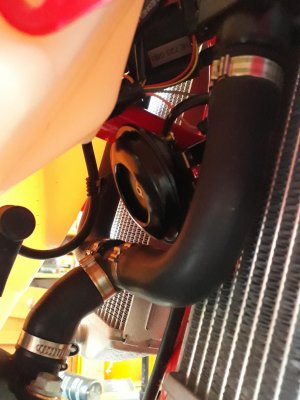
The signal horn is to close to front fender

Moving the signal horn
20180607_132013.jpg
Drill 13mm hole in the horn holder
20180618_190011.jpg
20180618_190759.jpg
20180618_191107.jpg
 
I replaced the stupid phillips head screws with Allen heads on top of the carburetor. M4 x.7 x 12mm. Picked them up at Ace Hardware for .95 cents each.

They aren't Phillips head... The small dot in the corner of the cross indicates that they are JIS head. Most phillips head drivers will strip them easily. My JIS driver has never once cam'd out on one. I did replace them with Allen Head screws on my last gasser since the PO had ruined them all with a Phillips driver.
 
I installed the Motion Pro T3 throttle cable on my '18 GG.
It routes in the conventional manner, in front of the bars.
Use part # 10-3000. 100% perfect fit.

23795007_1942353342449134_3096848633805536622_n.jpg
 
Last edited:
This was passed on to me.
Issue: Air filter side cover loose.
Repair. Install new grommets. Shown below.
You will need to remove the OEM grommets and drill the holes out with a 1/2" bit.
Access is still easy, just needs a firm tug.
KTM part # 47106003160

37782173_2321806894503775_105434704018145280_n.jpg


37863582_2321806944503770_2423944357766758400_n.jpg
 
Last edited:
Back
Top