2018 tech tips and tricks.

First time Gasgas owner

Hi Follks,
As the title says I'm a first time Gasgas owner as of a week ago. I grew up on Ossas and friends had Bultacos and Montesas (yes I'm that OLD lol), so the thought of a Spanish bike in the garage is exciting. I decided to look at a Gasgas after riding KTM's for several years and then the last couple riding a YZ 250 X (love it, it just inspires confidence) Somewhere in the back of my brain I kept thinking, wouldn't it be nice to have KYB suspension and still have a euro built machine? Enter the used 2018 Gasgas 250 XC. I had been speaking to a guy in the Pittsburg area about a GP 300 and then he stopped communicating and I saw it marked as sold (good for him). A couple months later along came the bike I ended up buying. I've just got a couple test rides on it and nothing too hard (Bow season just opened and the hunters deserve their time in the woods also), but boy what a hot rod!! That motor rips. Of course it's not all smiles and high fives. The electric starer (should be called the electric non starter) doesn't work at all when cold and works sometimes when it feels like it when warm. Reading all the post about this well known problem has me shaking my head, but hopefully I can work it out by myself or with Mattos Cycles about three hours away :eek: The previous owner told me he had the ECU reflashed and REGROUND the starter, but he didn't say if he installed the heavier gauge cables? Does anyone have a link to the original service bulletin? In my experience, sometimes people will pass on info that turns out to be completely different than the originally directed action.
Anyways I'm looking forward to learning about this new machine. :)
Thanks for your time
Preston
 
So after an odd somewhat frustrating odyssey trying to get the electric starter to work consistently, Bud at Matto Cycle suspects the CDI is failing. Unfortunately the 2018 250 XC CDI is on backorder.........Does anyone know if the 2019 250 XC CDI can be used as a replacement? Bare bones summary for the curious. Took the bike to Bud @ Mattos. He did the updates and reground everything, electric starter WORKED!!!............for almost a week, then started returning to intermittent functioning. The day I picked it up it fired up on the button 3 times, no problem. 1st ride at home it worked once warm. Every ride since then it has failed to start on the button more and more till last ride, it was back to not starting on the button hot or cold, spins plenty fast, just doesn't start. Thanks in advance :)
 
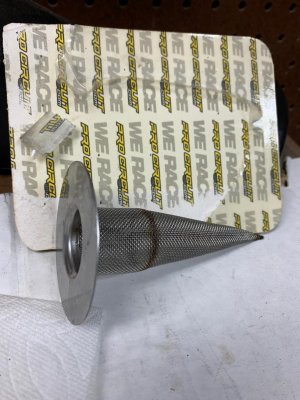
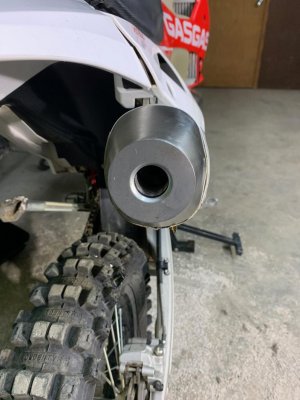
I liked the stock silencer, but needed a spark arrestor. This ProCircuit screen fits perfectly inside the stock unit, and is USDA approved. However - that fact is not stamped on the unit (and may be a requirement in your riding area).

Drill a couple of holes and add screws to fasten the screen to the exhaust, and you're good to go!

Jeff

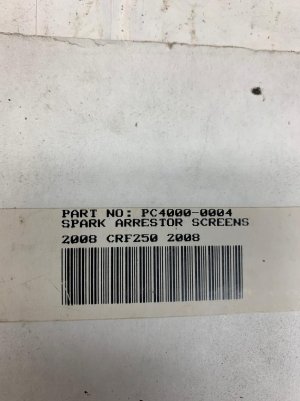
Part no. PC4000-004, $19.95.

IMG_2821.jpg

IMG_2819.jpg

IMG_2820.jpg
 
Rear spokes need retightening, already mentioned.
My case was, 9 spokes locked up, previous owner neglect. Whole spoke was turning.
Liberal heating the nipples with torch, while holding the spokes with grip locking pliers, they could be freed and tightened.
2 were really nasty, so removed completely, cleaned treads, anti seize compound, an it was all set.


Starter motor clicking, even with Lion battery, increased cabling and fine tuning the bendix rotation.
Disassemble the motor, clean thorougly, apply new heat resistant grease to needle bearing and bushing.
Put the rotor in table drill, give it a spin and use sandpaper, to clean the brush contact area (comutator). It should be smooth and shiny.
Be sure to remove possible contact particles between individual comutator contacts. Use stanley type knife.
Recommend doing this every 10-20 hrs, depending on starting volume and water penetration. Check brushes also.


Disconnect lower shock and linkage forks. Check for free movement of "L" linkage. Mine was binding a lot, bearings were intact and lubed.
Removed 0.9mm distancing shim. They are on both sides of the bushing, one was enough. Movement completely free and still a tight fit, without free play.


New style plastics won't fall away, since they now use a tab on the rear of both side number covers in combination with rear fender.


If riding tight enduro, remove the light switch, if you have enduro rotating type, and place it freely behind the front mask, use some zip ties. Its quite costly to replace at 70?.


Using plastic swingarm protector might do more bad than good if riding wet, muddy conditions. Only useful for dry rocky aplication.


Clean air filter regularly, a no brainer, and make sure to heat up the bike properly, or piston will be slapping a lot sooner than needed, due to uneven expansion of piston to cylinder. I'm replacing A piston @ 60hrs, worn to 71.88 (from 71.94). Luckily, cylinder could be polished to former glory with no excessive wear. Previous owner neglect, might I add.


Cylinder gasket, the metal one, 0.5mm, can be reused. Just degrease it, dry it and apply heat resistant spray to both sides. Once heated up, it will bond and seal. Its a hurry up solution, working flawlessly. Use new, if not in a hurry or parts available.
 
"Using plastic swingarm protector might do more bad than good if riding wet, muddy conditions. Only useful for dry rocky aplication"

I used a plastic swingarm protector for about 9 years and never took it off, but i did put a liberal amount of duct tape on the swingarm before putting the protector on. Took a while to remove the glue, but other than that the swingarm was still like new (except where i had actually worn through the guard)
 
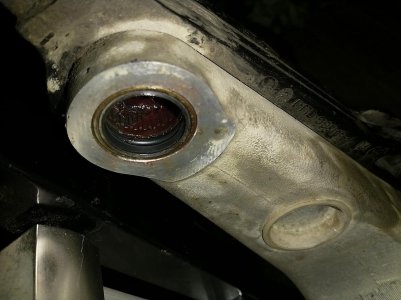
Added orings behind seals on swingarm. Enough space, inner bearings needed just a little push inwards.
Its hard to source correct seals, but still easier than ordering OEM in these times.
 

Attachments

  • IMG_20210407_174810.jpg
    IMG_20210407_174810.jpg
    121.5 KB · Views: 18
Added orings behind seals on swingarm. Enough space, inner bearings needed just a little push inwards.
Its hard to source correct seals, but still easier than ordering OEM in these times.

O-rings are a better option than the seals.
 
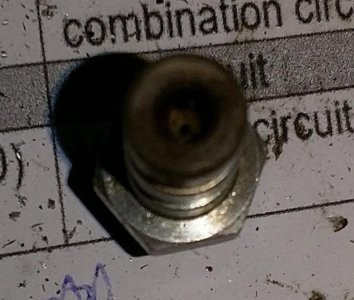
Has anyone increased size of the breather "jet", located left side power valve.
It seems pretty small hole, and of course it was clogged useless.
Old bike had bigger caliber, and I believe also bigger drain hole in cylinder wall.

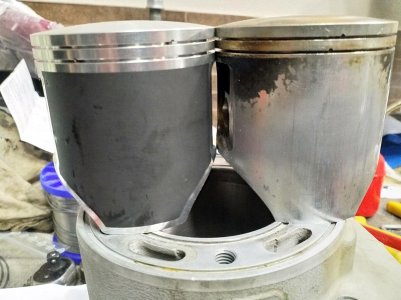
Stock S3 piston ring ends are close together and travel through port, while vertex has them spaced, never leaving the wall.
 

Attachments

  • IMG_20210409_210412~2.jpg
    IMG_20210409_210412~2.jpg
    112.5 KB · Views: 32
  • IMG_20210409_190354.jpg
    IMG_20210409_190354.jpg
    119.4 KB · Views: 37
That jet is just a drain, the hose is clamped off from the factory make sure it is open. Never had a need to make it bigger.
Re the rings, most manufacturers have differing thoughts on them. Some have the gaps in constant contact with the wall, which I prefer, others have them passing over the transfer/boost ports. They are small enough that it isn?t an issue.
 
I did increase the breather hole to 1.5mm, as it was stuck with gunk. Tube is not blocked at the bottom, but joined into "Y" with other side breather, and then out.

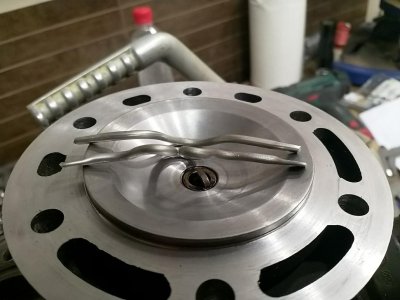
Just had the head cut. Old piston squish was 2mm. With new piston was 1.75mm. Cut it to 1.24mm.

Since new piston is apprx 2/10mm higher, he said to use aditional base gasket, to correct port height to piston crown, as it results in 4 degree difference, which could affect top revs.
But I think, those engines aren't so picky, to really need an exact match to previous piston, since you can get them delivered new at very different settings, 200 rpm give or take.... Also exhaust port is perfectly lined up. From factory, one 0.5mm base was used. Will see how it behaves, and adjust if needed.

Head depth was also adjusted, have to measure compression.
 

Attachments

  • IMG_20210411_133102.jpg
    IMG_20210411_133102.jpg
    107.3 KB · Views: 38
Chamber hole still much larger then the increase I made, so will keep it stock for now. Cant see the drain affect engine. I see the small hole as an eco drippage preventer and floor stain after use minimizer. Bandage for overly rich bike when stock.
 
Breather bolt, LHS

Two options available -
- 0.5mm, called a devap., whatever that means, deeaporate??
- 3.0mm, probably stock non eco friendy, ment for direct-out hose routing, for free spill

So it is a tunable part, and both are speced for 2018 model, didnt check other years.
 

Attachments

  • Clip_84.jpg
    Clip_84.jpg
    24.6 KB · Views: 14
The 3mm fitting is for the transmission vent- top right of the engine.
The .5mm one is for the power valve drain.
 
Back
Top