You are using an out of date browser. It may not display this or other websites correctly.
You should upgrade or use an alternative browser.
You should upgrade or use an alternative browser.
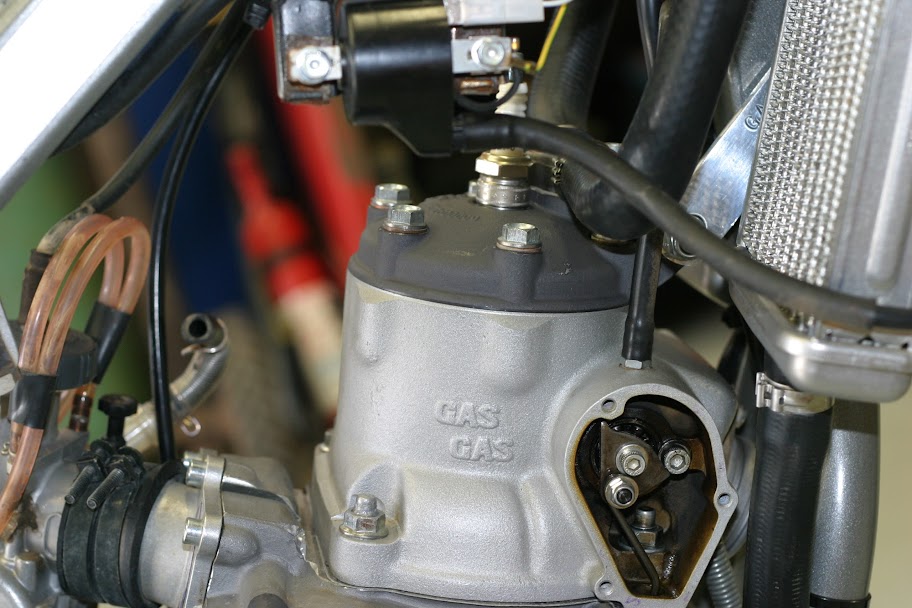
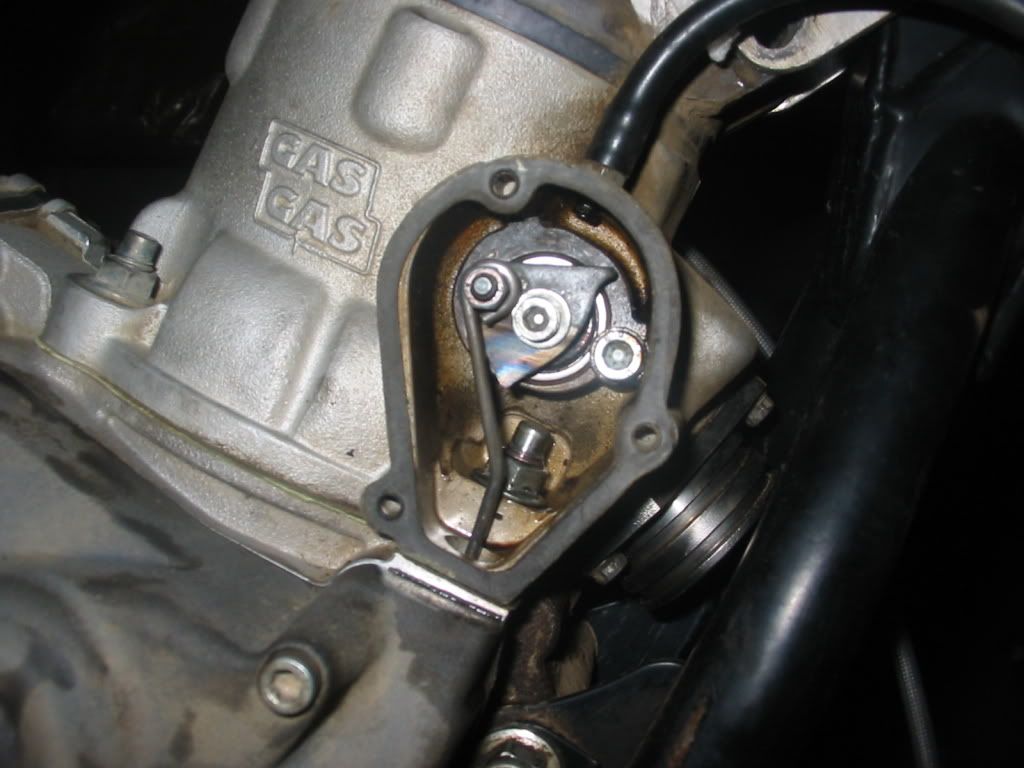
PowerValve Issue- Take A look at this Picture
- Thread starter alexpp
- Start date
iancp5
New member
You've connected it correctly. I can't remember exactly what angle it sat at. It doesn't have to move much - look up the exhaust port and move it to see how much it has to move to fully open then start the bike and check it moves that amount when revved. Thought there was a small washer under the nut though.
ramcclure200
Gold Level Site Supporter
here is a picture of mine, sows washer also.
http://picasaweb.google.com/ramcclure/2006_07_16#
http://picasaweb.google.com/ramcclure/2006_07_16#
The PV shaft is "half moon shaped", and fit in a coresponding half moon in the
bracket that is held in place by the allen screw.
Undo the screw and look carefully and you will see what I mean.
Turn the PV shaft and poke a finger in the exhaust port so you will feel when the PV is closed, that will be the position you are looking for.
NOTICE, the PV shaft can rotat as many turns as you want, and during a 360 deg turn there will be two closed points. Only one is the correct one when the half moon cut out line up with the PV acuator bracket/washer.
I did this myself two day ago, hope this helps.
//
iancp5
New member
You haven't said why you are convinced it's half open? so what everyone is therefore saying is we can't remember the angle it sits in the relaxed position so look up the port or feel up there and check if it's fully down. But looking at those other photos does suggest yours is stuck! Best to be 100% certain. If it is stuck take the actuating arm off and check the PV rotates freely if that's ok it must be the centrifugal end. Apparently sometimes balls get jammed.
Let me try and explain it better.
That metal rod that pushes the whole powervalve mechanism will rest at this same spot even if I remove the nut that holds it in place. Basically I believe the problem is down, behind the right engine case cover (IS THERE A WAY TO ADJUST THE ROD THERE?)
iancp5- with regard to how the stopper should sit at rest.... ramcclure200 posted a good picture showing how it SHOULD be (this is how I remember it being when I took it apart)
ramcclure200 picture of how it SHOULD be
What you did by pulling on the rod was move the governer and a ball dislodged from its ramp, jaming the governer. You now have to remove the side cover to fix it.
Ok... so I removed the side cover, what do I do next?
Which part were you talking about?

PS: Thanks for helping me out here
GMP
Active member
Remove the governer assembly after removing the linkage (8,9,10). Examine the cup, balls, and ramp of the governer (24,25,26). It should be obvious a ball is displaced. Compress the spring and get the balls to lie in the correct position. You may be able to do it without romoving the governer but you have gravity working against you. Its not hard, takes a few minutes and nothing is damaged.
To avoid this problem, when I remove my cylinder I first remove the nut from the actuator plate stud, then the actuator plate from the drum valve, and finally the rod from the actuator plate. This lets you move the loose plate around to free it from the rod rather than pulling on the rod.
To avoid this problem, when I remove my cylinder I first remove the nut from the actuator plate stud, then the actuator plate from the drum valve, and finally the rod from the actuator plate. This lets you move the loose plate around to free it from the rod rather than pulling on the rod.
iancp5
New member
To avoid this problem, when I remove my cylinder I first remove the nut from the actuator plate stud, then the actuator plate from the drum valve, and finally the rod from the actuator plate. This lets you move the loose plate around to free it from the rod rather than pulling on the rod.
Good tip. I've been lucky so far but this will help weight the luck in my favour.
Similar threads
- Replies
- 4
- Views
- 1K
- Replies
- 9
- Views
- 4K
- Replies
- 3
- Views
- 2K

