Sachs 48 mm fork - yet another oil change question

Be aware, if you mess anything up, you can't get parts for these forks. At least that has been my experience. I won't touch my Sachs forks anymore. If they need service, they go to my dealer.

Sorry that I can't offer anymore useful advice.

Good luck mate.
 
If you're halfway careful you should be able to use Les' instructions and have no issues.

The biggest thing to remember is that the rebound adjuster is threaded into the damper rod, so as you take the cap off you need to thread the adjuster out as well, and when you put the cap back on you need to get the adjuster threaded into the damper rod at the same time.

There are *some* parts available for Sachs forks through Beta, and I'm working on sourcing others as well.
 
I believe I'll break the internals if I follow the cap removal procedure shown in the video?

Why would you think that? The video was a good primer on what you need to do, but I would add that when you are removing the cap it's a good idea to also screw out the rebound adjuster (to prevent it from withdrawing all the way out the bottom of the cap).
 
Coming back to this...

If I just change the oil (remove the top cap but not remove the cap from the rebound adjuster rod), do I have to bother the adjuster screw at all?

To my understanding, the internals are at stake only when you detach the cap from the adjuster rod?

I'd take the forks to a pro if there were any...

You need to cycle the cartridge to pump the old oil out, and again to bleed up the new oil. Air gap is also measured with the spring removed and fork collapsed.. and to do this you need to remove the cap to get the spring out.

The fork isn't hard to work on by any means. As long as you pay particular attention to the cap and adjuster (which threads into the damper rod and can easily be cross threaded). Few posts on the topic if you search.. And, if removing the base valve to note that the alloy is quite soft, so a 6 point socket (preferably with the lead in ground down) will give you the best contact area and reduce the chance of rounding it off.

I have a set of carts here (out of the forks), so if you'd like any pictures I could probably snap a couple off to demonstrate.
 
I'll see how the kids are behaving today. Might get a chance to do something up. Won't be a full how-to. Just a break-down on the cap.

Should also note that there are a few different caps in circulation (some with preload adjustment). There are some variations between them and their internals but the clicker threading into the damping rod is a common factor.
 
So a few more pics. Doesn't really show anything that the other links provided don't though.

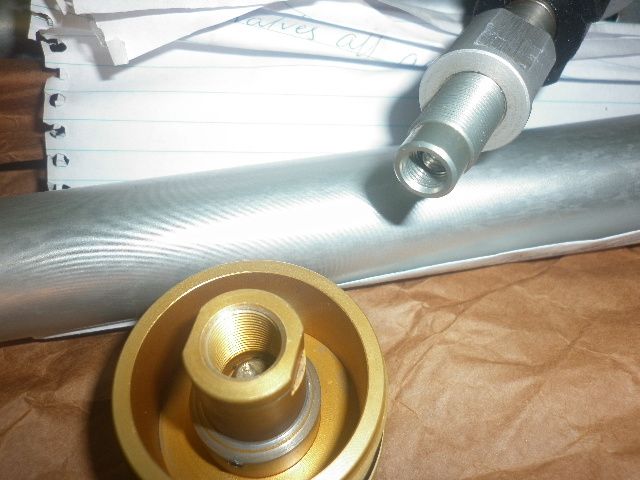
So remove cap, remove plastic spacer, ensure the locknut on the damper rod is threaded right back. Note that the damper rod has an internal thread - this is what the clicker threads into.
P1020460_zpsxivpfj9e.jpg


The clicker itself will most likely back out with the cap, or you can ensure it does like Steve (twowheels) mentioned earlier in the thread.
P1020461_zpsnlq88mso.jpg


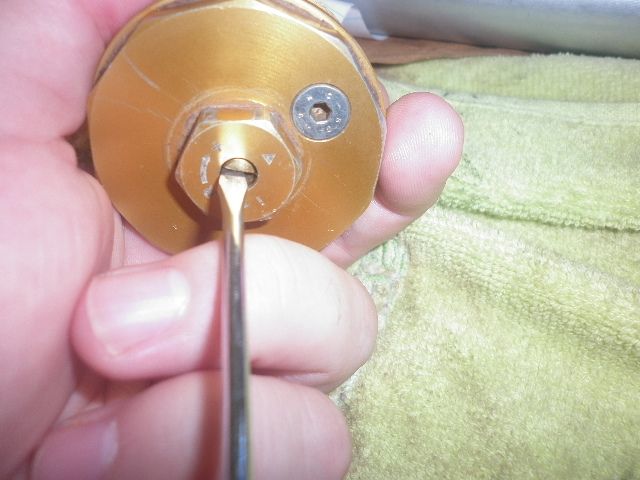
Applying pressure on the clicker with the screwdriver as above, the whole clicker will push out of the cap. You can see this clicker has different coloured threads.. I made the mistake myself first time through these forks. Can confirm what has been said that replacements aren't available. I ended up using silver solder and then retapped the threads.
P1020462_zps35ord21k.jpg


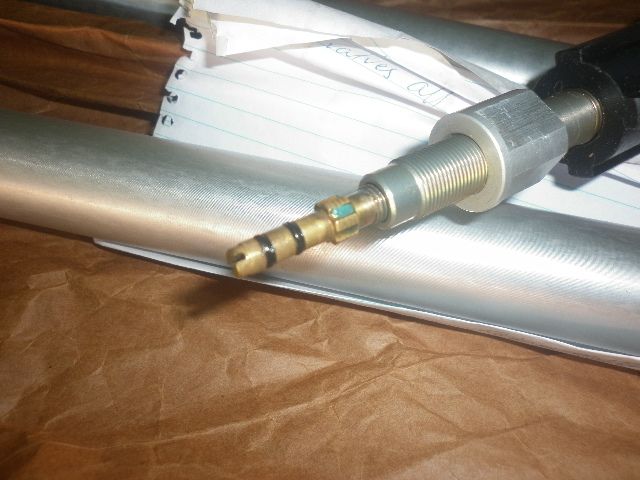
And finally, a picture with the clicker sitting in the damper rod, no cap attached.
P1020463_zps2fzeejbp.jpg


You can actually assemble the fork with the clicker in like this, and then lubricate the O-rings with a silicone grease and fit the cap over the top. You will feel the indents/clicks roll over as the cap moves over the clicker assembly.

The other methods as described by LT and SP work as well.

What doesn't work is trying to smash the cap on without confirming the clicker threads are engaged as well. You should be able to turn the cap on mostly by hand with little resistance if things are going together correctly.
 
I did the job according to Jacobi's instructions - thanks again for the clarification.

A few questions:

- the oil was black sludge in appearance. Will I have to kiss the forks goodbye or will they serve okay in my light-duty use?
- after the job, as I pumped the forks up and down, oil kept seeping between the red circle in the top cap and the 19 mm hex part. Do I need to dismantle the top caps and replace the seals?
- do I have to open the tiny air purge screws to let air out or what is their purpose?
- I have plenty of 5W fork oil left - is it suitable for the clutch hydraulics?
 
If the forks haven't been serviced in some time the oil will generally be pretty fouled. I'd change the oil again in another 50hrs and inspect again.

If you have the adjustable preload caps as per LT's webpage, the leak will be one of the O-rings. It's very common. Cap needs to come off and disassemble to replace.

Air bleed screws are to vent pressure build up. In use some air can get past the outer seal and pump your forks up a bit. Should only get a small hiss of air every now and then. Some brands/seals are worse than others.

Fork oil is OK for use in clutch system that asks for mineral oil.
 
Back
Top