2007 ec 250 refresh

imsimon

New member
hello all
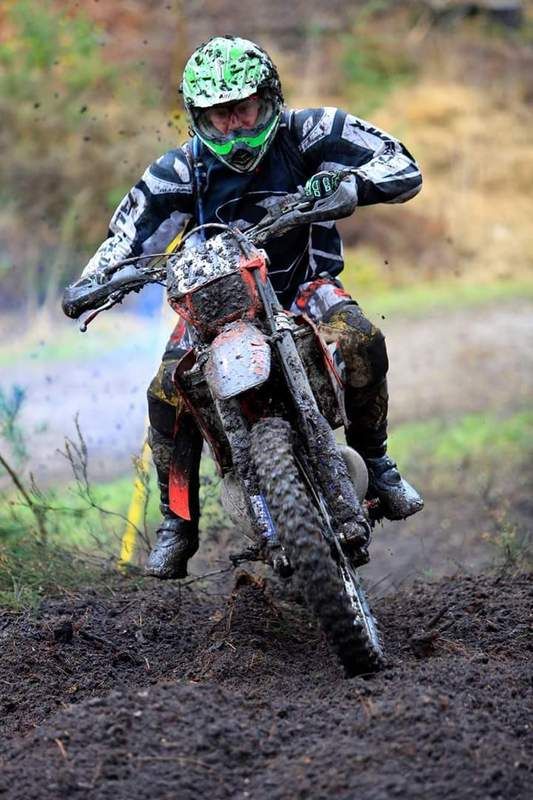
my bike has started to look a little tired so I thought I would do a little thread of a freshen up of it. its not a major rebuild like some of the amazing threads on here just want to bring a few things back up to where they should be. Im not a mechanic and hardly have any experience. im in the uk and I race very slowly in sportsman class (that's the slowest class!) heres me at my last race 2 weeks ago


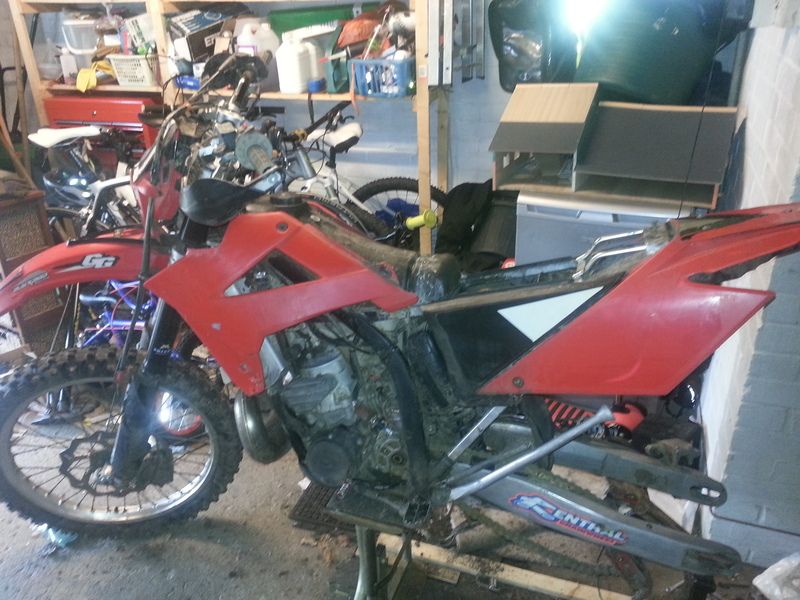
anyway after this event I just couldn't get the bike clean from normal washing so decided to start taking bits off etc and have now decided to do a few jobs the main job being removing the suspension for a service. the other jobs are going to be
coolant change, clean up the exhaust chamber (and maybe polish up) new lower shock bearing as slight play, (ive already done this) new graphics, either just rad or complete kit not sure yet, clean the carb and probably a load of other little jobs, like I said I know its nothing major but thought id document it anyway.

I hadn't decided to do a thread when I started so heres the first pic as I was getting stuff off the bike
 
The first job was on the rear brakes, I had thought something had happened during the race as I had lost all braking power on the rear very noticeable on the steep down hill bits! got to the end and found the slider pin that holds the caliper to the carrier had gone! along with the shim that holds the pads in, as a result the pads had come away hence the no brakes, the caliper was a bit of a mess so ive tidied it up and installed new pin and rubber, and shim. I ordered new pads but the company sent the wrong type so still waiting for them, no pics of this im afraid,
next was one of the most important jobs for me, the rear lower shock bearing, there had been a bit of play in the rear and I knew it was the lower shock bearing as I had recently replaced the top shock bearing and had checked the swing arm bearings, was a little nervous for some reason as hadn't done one of these before but with the help from this forum it was surprisingly easy, wish I had taken pics but anyway I used a vice and a 16mm socket to push it out and the new back in, pleased and it looks so much cleaner now

next job was remove the rear shock, always a little fiddly but came out fine, looks a little dirty hey! Im going to be taking it to a shop for a service, I know you can self service but ive never done it and thinks its probably a job best left to an expert unless someone wants to tell me different!


heres a pic of the doglegs obviously one cleaned and one not. Im trying to get it all nice and clean, all bolts get a soaking to clean them up!
 
I wish more people would create build threads. I like seeing the transformations and it keeps me occupied on slow days at work.


Looking good!
 
Shang - thank you very much I love others threads like this so thought I might as well do my own!

Jackobi - thanks i'll keep the pics coming

Rockerfella - your thread was awesome, Im hoping to pinch your way of doing the exhaust, I would love to do the 2011 conversion, im still toying with it but I might just save my money for now and actually get a 2011 in a year or so? not sure yet.

anyway yesterday I had an "educational" moment with the bike! stupid looking back but didn't think at the time, rear wheel is out as you know, took the front wheel out and the bike wasn't balanced so as I took the front wheel out the whole bike fell forward on me, got it back up ok but made me laugh and look stupid all the same! ive put the back wheel in just to keep it still.

I took the forks out, then gave them the shock a wash, also started to clean the exhaust, the silencer is quite new about 5 rides fmf powercore 2 so that just got a little wash, I think the chamber however will take a bit more patience for what I want from it!

hoping to get in the garage again for an hour later so hopefully some more pics tomorrow

for now heres the new lower shock bearing in, wish I had taken a pic of the old one!


and heres the exhaust just prior to its wash, that's mostly mud the darker colour but its going to take a lot of wd40 and elbow grease to get it up to standard!

 
oh and graphics, I will probably stick with the plastics ive got and put new graphics on (if you look at my first picsture when I was racing look in front of my left boot you can see my rad graphics hanging off!)

I like the look of these but they only have a picture of the bike on a 2015 model, think I might just go for it and hope they look good!
 
been out in the garage for a couple of hours, not sure what I actually achieved!
mostly cleaning stuff again.
heres the forks out the bike


just a little shot of the tiny sort of cleaning jobs ive been up to today


bit of a scrubb and not perfect but


then did the plastics, no pics sorry
then my attention turned to the exhaust, its going to take more elbow grease than first thought! this is the before but my hands were to messy to pick the camera after!

 
I find with most tasks involving the dirtbike the bulk of the time and effort is spent cleaning. For example, it takes me longer to wash the bike clean enough to start surgery than it does for me to get the cylinder and piston removed. Then it takes longer to clean the powervalves than it does to spec up the new piston and ring gaps. Then it takes more time cleaning up the gasket surfaces than it does to put it back together.

And when all is said and done, and its nice and clean and shiny, and you stand back and admire it.. it only lasts as long as the next ride.
 
I find with most tasks involving the dirtbike the bulk of the time and effort is spent cleaning. For example, it takes me longer to wash the bike clean enough to start surgery than it does for me to get the cylinder and piston removed. Then it takes longer to clean the powervalves that does to spec up the new piston and ring gaps. Then it takes more time cleaning up the gasket surfaces than it does to put it back together.

And when all is said and done, and its nice and clean and shiny, and you stand back and admire it.. it only lasts as long as the next ride.

Well after you posted this while the exhaust is off I thought it would make sense just to have alook at the power valve through the exhaust, looks like its stuck at something near closed. Bugger. Ive never done anything with powervalves so ive started reading, I then thought I cant be doing with this and thought ill book it in at a garage to sort but then having thought about it, if I didnt do it now I wouldnt understand it if it goes wrong in the future, so I guess u need to order gaskets for pv left and right and clutch gasket drain coolant and then just dive in and see whats what

edit/
reading seems to suggest it could be stuck from carbon build up on either side so maybe best place to start would be just remove the PV covers and clean everything out best I can from there or should I just remove everything?
 
Last edited:
Well after you posted this while the exhaust is off I thought it would make sense just to have alook at the power valve through the exhaust, looks like its stuck at something near closed. Bugger. Ive never done anything with powervalves so ive started reading, I then thought I cant be doing with this and thought ill book it in at a garage to sort but then having thought about it, if I didnt do it now I wouldnt understand it if it goes wrong in the future, so I guess u need to order gaskets for pv left and right and clutch gasket drain coolant and then just dive in and see whats what

edit/
reading seems to suggest it could be stuck from carbon build up on either side so maybe best place to start would be just remove the PV covers and clean everything out best I can from there or should I just remove everything?

Have you removed the actuator rod to see if the PV flapper moves freely? It won't move unless you unhook it. If you rotate the flapper without unhooking the linkage, there is a very likely chance that you will dislodge the actuator balls and have big problems.
 
The honest answer is I dont fully understand how the pv works but im trying to read up, so iy rotates rather than just up/down? I think im happy now with stage one being take both pv covrrs off disconnect the arm and then a) like u say see if it will move and b) clean up any carbon and it looks possible to slide the whole pv out of the lh side to give a good cleaning?
 
The honest answer is I dont fully understand how the pv works but im trying to read up, so iy rotates rather than just up/down? I think im happy now with stage one being take both pv covrrs off disconnect the arm and then a) like u say see if it will move and b) clean up any carbon and it looks possible to slide the whole pv out of the lh side to give a good cleaning?

Its an sentrifugal governator that spins and pushes the actuator arm up as the revs goes up. Its very simpel.

Ive done the same job as you do, also as in your case, the linkage and lower shock bearings was destroyed, in my case that broken that the link had stuck, and worn the engine cases.

Good luck!
 
I wouldn't bother doing anything with the PV unless if you intend to remove the cylinder, head, or exhaust spigot. If it was working (read running well) prior I'd leave it.

As above. Don't try and cycle the PV while it's connected. It's a very simple setup and not hard to do. Just a messy job, best left to be done with the top end (which is why I service mine during pistons, to avoid having to do it any other time).
 
Hmm now im wondering shall I just bolt it all back together and stop overthinking everything or should I just put a new top end in while its apart so I know its all good but I suppose if its not brok why fix it!
 
Back
Top