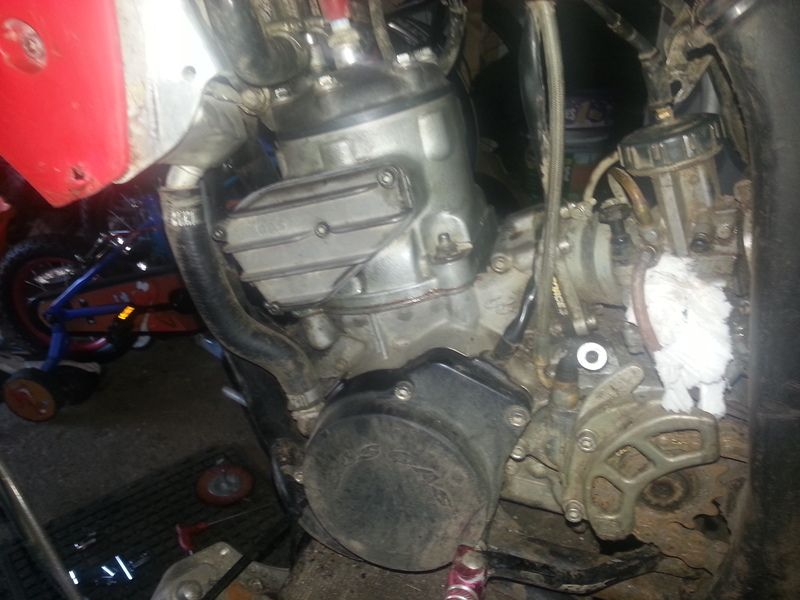
2007 ec 250 refresh

The p valve gaskets are included in a topend gasket kit.mine came away clean at dissamble(topend)so i reused them(figured it would be pretty obvious and a 5min fix if they were no good - weeping oil,and that if i needed to get at/clean pv before i was due a piston i had new spares).took no chances with base gasket and orings due to the amount of time/effort in replacing them and the increased 'what if..?' factor
 
Last edited:
The p valve gaskets are included in a topend gasket kit.mine came away clean at dissamble(topend)so i reused them(figured it would be pretty obvious and a 5min fix if they were no good - weeping oil,and that if i needed to get at/clean pv before i was due a piston i had new spares).took no chances with base gasket and orings due to the amount of time/effort in replacing them and the increased 'what if..?' factor

Same as how I roll. Happy to re-use PV gaskets unless obviously torn. No issues with reusing the stator gasket either.

Any time cylinder comes off I replace the base gasket. Have considered re-using head O-rings but never bothered for what they cost. I would in a bind.

Water pump gasket never comes off clean. Always replaced.

To the OP. Your decision re top end. I toast a 250 piston and rings to the point I can notice the decline in snap and bottom end in 65hrs. I have however ran them up to 110hrs and the ring ends were then beyond spec... but everyone is different. In many cases you don't really notice the decline in performance until you replace it... and then its WOW for a couple rides at least :cool:

Decided to definitely do a new top end now, the more I think about it the lore I think the performance has dropped, front wheel doesn't come up any more etc, also ive had the bike a while now, ive probably done over 50hrs on it yet I dont know when it was done before I got it so ive decided its only a bit more in cost than a set of graphics so they can wait and ill spend that money on a new top end and give the pv a clean, put that with freshly serviced suspension and bike should feel great and graphics can wait a month or 2!
 
Excellent thread. Doing a similar job myself on my 07 ec250. Two point that might help you. To shine up the front pipe use 'Mothers Mag & alumininium polish' I found it very good. Cheapest place I found for full graphic kits was
http://www.moto-stylemx.com/eshop/en/store/gas-gas/ec-series-07-09/results,41-40
(Their ebay store is cheaper).
I also found motocrosscentre excellent because of the full diagrams, easy to get part numbers also.
http://www.motocrosscenter.com/shop/en/content/8-gas-gas-parts-manuals

Keep the photos coming.

Thanks stamper I appreciate the input!
I had never heard of mags until I read another thread and ordered some up, ?8 delievered from ebay, used a little seems good but its no where near finished.

motorcrosscenter has already been helpful! I also use haines mc - not always the cheapest but good service from them and they know their stuff

I quite liked some of those graphics but my fav are still the ones I put the pic of.

The pictures will keep coming but ive not got any to update yet!
Ive decided to do the top end myself, Ive drained the coolant and taken pipes off the head, I note that my cylinder is a 'B' I personally would just order a B piston as from what ive read the differences are so minor its not worth worrying about,
suspension is getting dropped off at a local garage tomorrow hopefully for servicing, I should have a bit of time this week to hopefully finish cleaning the engine enough to take the cylinder off and get the disassembly of top end finished but it all depends on how much my little girl will sleep during the day!
 
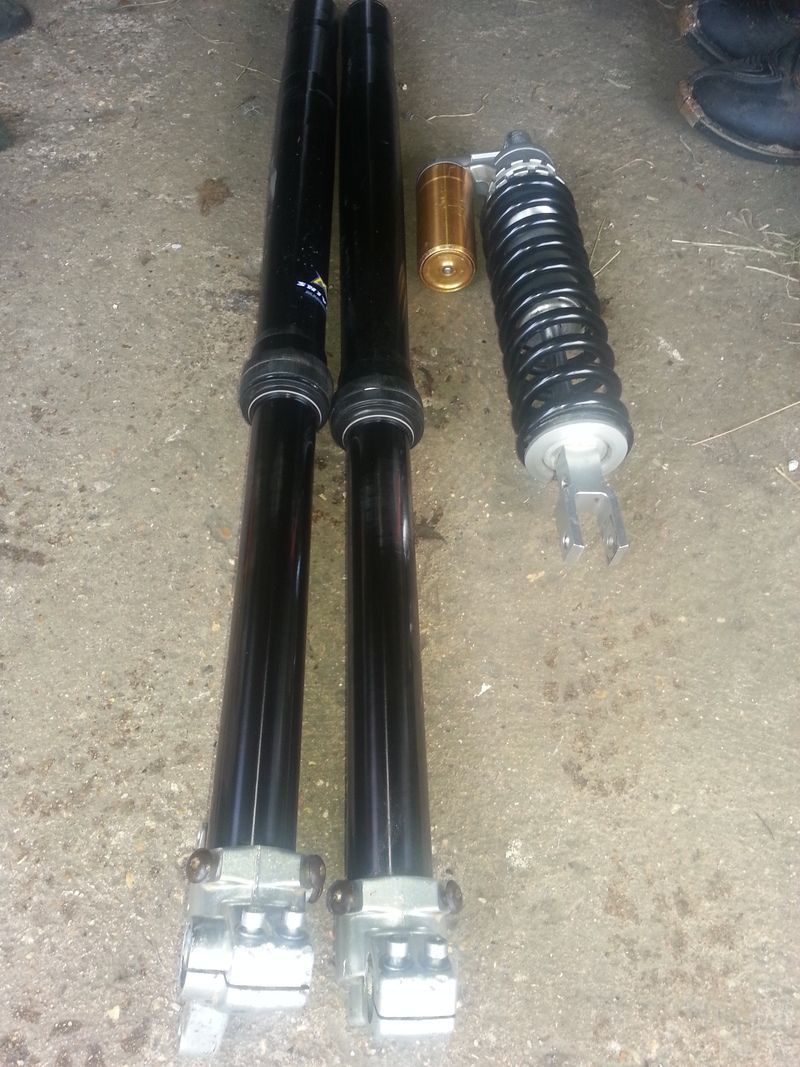
dropped the suspension off yesterday and am going to collect it in a weeks time.
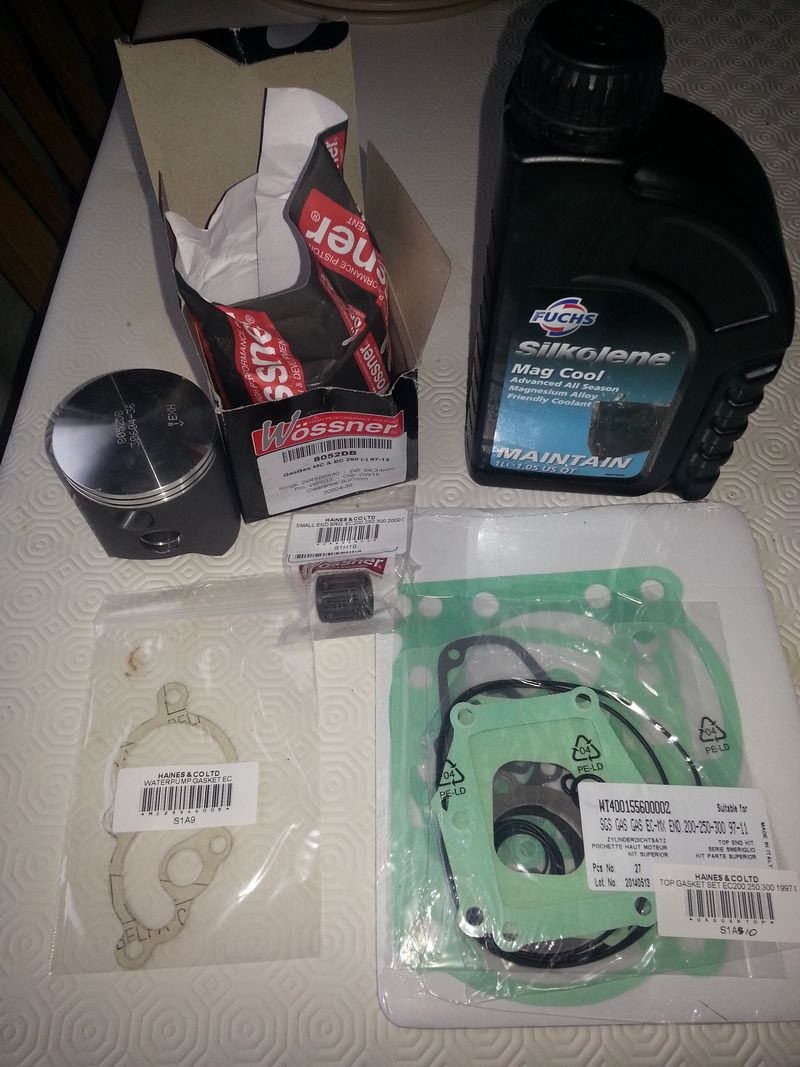
ive been ordering today, ive ordered hopefully everything I need to sort the top end out, Piston kit (Wossner B) top end gasket set, water pump gasket and some more coolant.
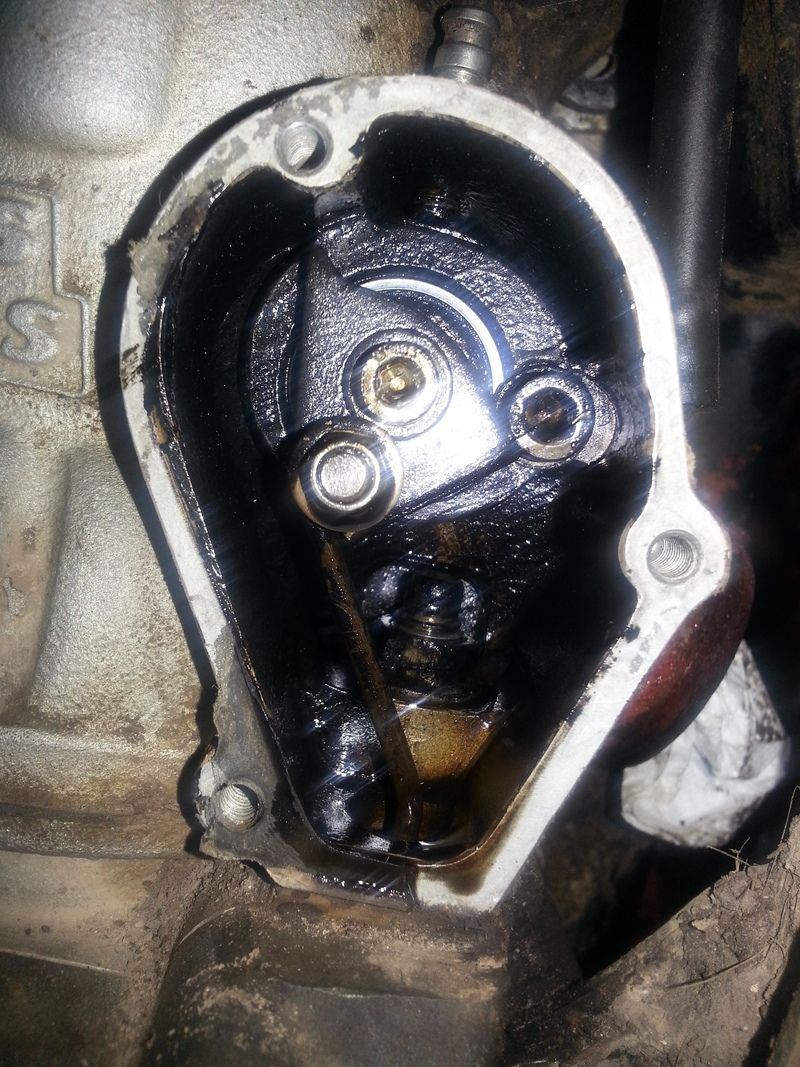
ive disconnected the radiator pipes where the enter the head, rather annoyingly one of the radiator bolts has rounded off on the right side but I was able to turn it away in any case, I then took both power valve covers off
right hand side


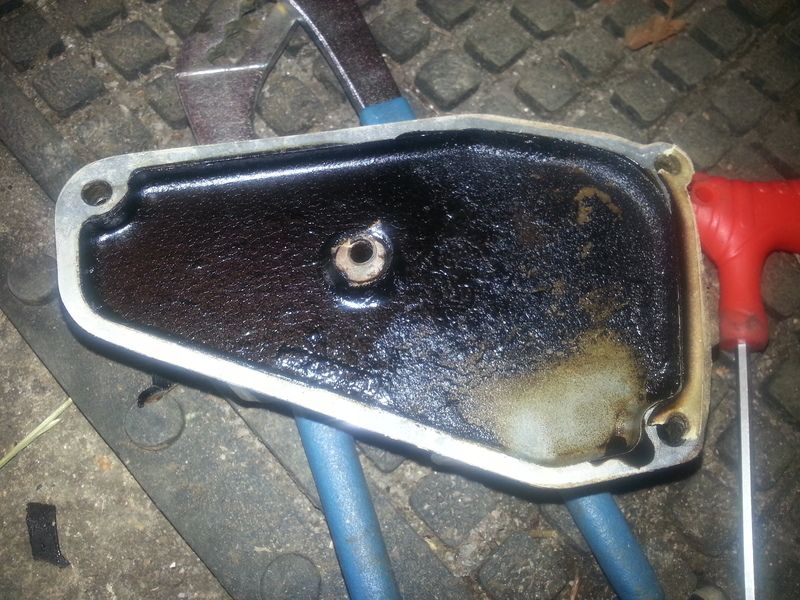
then the left hand side, first is the inside of pv cover


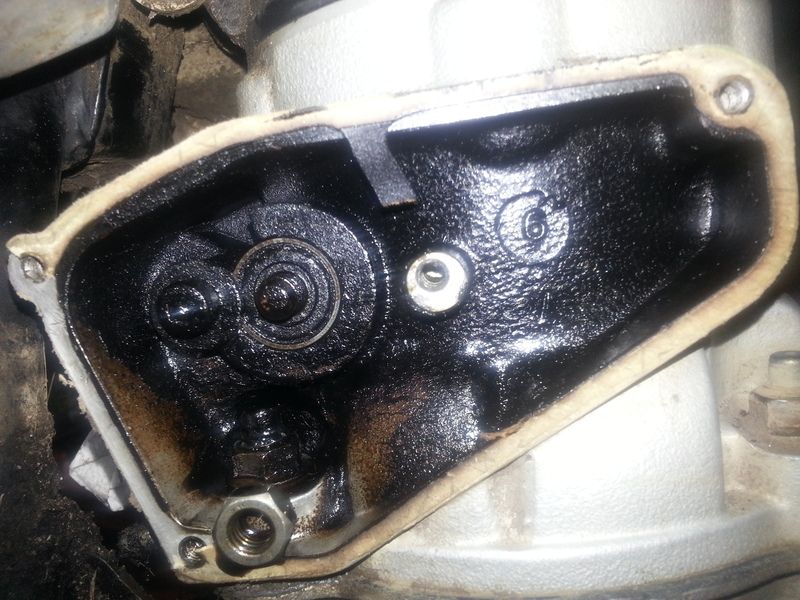
and then the inside of left side, spot the error!


yep that's exactly how I found it with that nut loose and not attached to the PV rod covers now have carb cleaner sitting in them

I haven't been lucky with the PV gaskets like Ive seen some people are but hey ho, new ones here in a few days

My main problem now is time! im currently working lates that are 4pm to midnight, and in the day im looking after the little girl, she normall has about an hours sleep in the day and that's the only time im getting, I feel like I could get through the job in not to much time but Im determined not to rush and make a silly mistake and mess it all up
 
The LHS PV doesn't need a nut on it (and doesn't come with one stock). I would leave it out all together.

With the gaskets, I loosen off the bolts a bit and then give the part you're removing a couple of taps with a mallet (sometimes use some timber to aim it up in certain areas). The shock often breaks the gasket surface away cleaner.. but not always. A bit of grease on the surfaces on assembly helps too.

ahh ok to be honest from what I had read I didn't think there should of been one in there so was surprised to see it in there but presumed as it was there it should be!
any particular grease best on reassembly? ive got copper grease and bells waterproof grease in the garage
 
Dont forget your needle bearing for the gudgeon pin.and check it matchs what came out(i was sent one too narrow).if not you want a yz/cr 250 small end bearing.any code/no on the piston rings must face up.wether or not you plan to do squish its worth measuring while you have the lid off
Take care not to bend/lift pv arm (its a fiddly fit)and check its returning fully to its stop.when you tighten the pv arm nut,dont let the whole assembly rotate.you can also start engine with rhs pv cover still off and check its operating freely/correctly

Some really helpful advice! cheers
I have also ordered the needle bearing for gudgeon and will check its ok, I trust the supplier so hopefully all will be good! hadn't even thought it might matter which way up the rings go so thanks for that


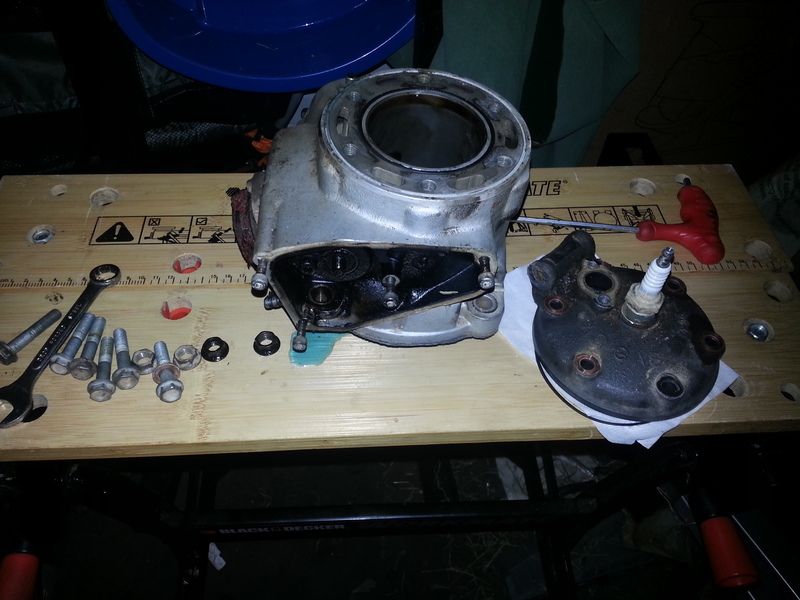
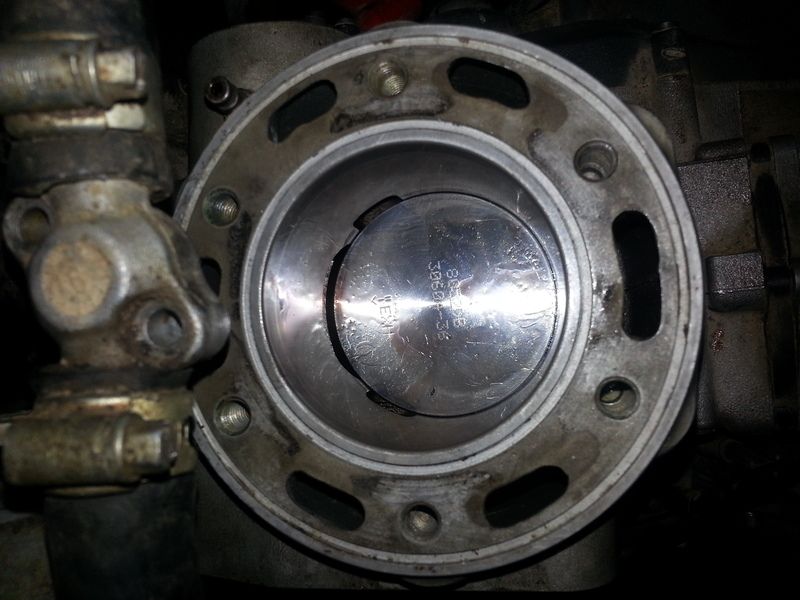
head came off and heres the top view looking down.
If your any good at knowing what the condition of this is let me know!

no pics as was rushed but also taken the cylinder off.
Pv seems to be working, only query is that if I manually push the flapper up then let go it stays up rather than returning to closed position. If I do it using the pv thing on right side (thays the technical name!) Turning that back does bring it back to closed and seems to kove easy etc
 
cylinder now off,
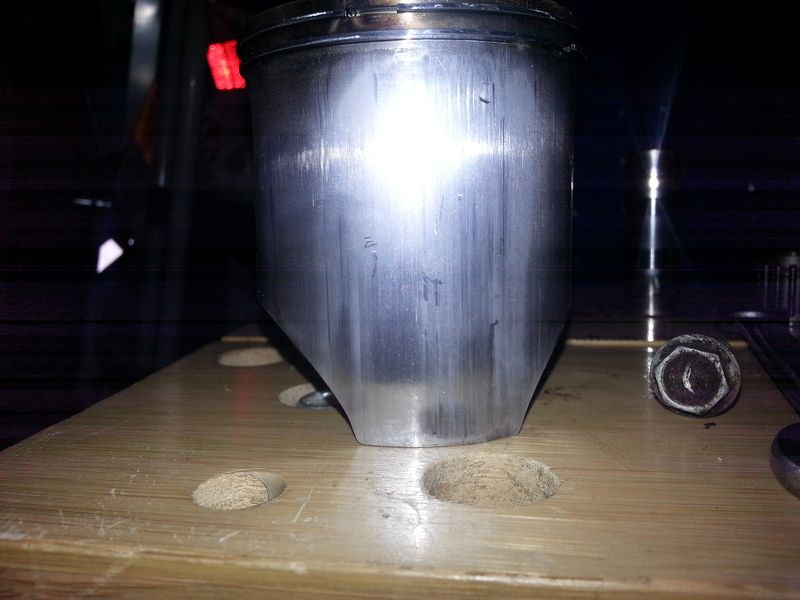
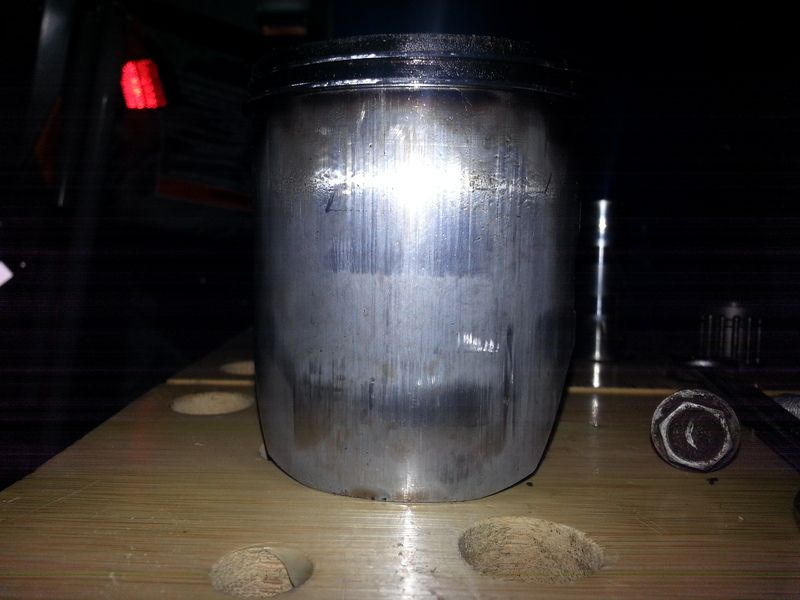
got the piston off this morning (amazing how easy jobs are that seem quite daunting if you've never done them before!)


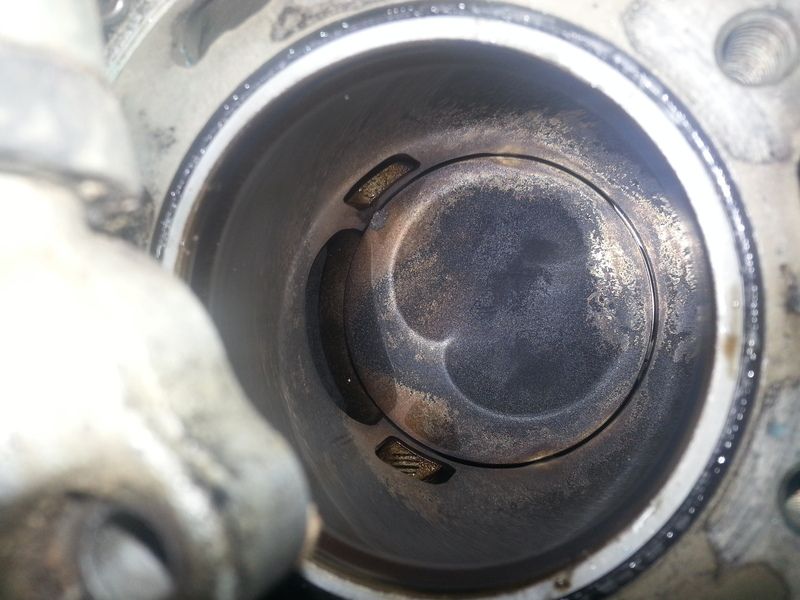
no blow by on the back

and the front..


also had this lovely delivery from the postie today!


Its a shame I just want to put it all back together but I know I really should take out and clean the PV while the cylinder is off, again seems a little daunting as according to the pics theres a load of different bearings etc and I don't want to mess it up but I know the best thing is to just work slow take it all apart, clean up and put back in. just wish I had a complete afternoon that I could just have nothing else on and go for it anyone fancy some babysitting?
 
Well ive done a lot more than I thought I would get chance today! shame I had to stop to wake the little girl up as I could of just kept going!

anyway, got the new piston in.


I then turned my attention to the power valve, and as I had said before it was straight forward and I needn't of worried, no pics im afraid though as my hands were a bit messy by this point! its all out and to be honest seem all quite good, ive got rid of the carbon on all bits and now have it all soaking in 2T oil. probably didn't need doing but glad I did as I know how it all fits together, The exhauset spigot was a bit of a mess so cleaned that up as well,

and that's where I am now, I feel like im now on the home stretch as in putting back together rather than tearing down! hoping Monday will get chance to do some more, the only real jobs for the engine is to get carbon out of the PV areas left and right, put the PV back in cylinder, clean the cylinder properly on outside, hone the inside of cylinder with a bit of carb cleaner and scoth pad I need to get an oring for the spigot (1 had broke) and then put everything back together! exciting times!
 
Good progress.

Replace both O-rings on the spigot. They are a wear part. Make sure you use Viton, and I also add a smear of high temp silicon around them too.
 
Good progress.

Replace both O-rings on the spigot. They are a wear part. Make sure you use Viton, and I also add a smear of high temp silicon around them too.

thanks as always, your help is appreciated! 2x rings arrived, and already have some suitable silicon for them!

not much to report, the Powervalve is all back in and feels much smoother to operate, ive turned my attention to my carb settings which maybe a little premature as ive haven't got everything back together, Ive done a fair bit of reading and seems the blue needle from JD is the one I need, I also read they are hard to come by in uk, found a red and blue needle on ebay and won the auction last night, they have been 'lightly used' by someone sorting jetting on a ktm. ive probably paid a little more than I needed but if its the one to have im happy. was ?27 for red and blue, I will sell the red to lessen the money, I could of had a new ne3g for less than ?10 but I thought id try the blue.

still waiting for enough time to get on with putting it back together!
 
URL=http://s46.photobucket.com/user/Imsimon/media/20160301_152415_zpstnpujcgm.jpg.html]
20160301_152415_zpstnpujcgm.jpg
[/URL]

it ended up a bit cleaner than this but thought I should prove I had cleaned the pv

today ive managed to start making it more like a bike again! Cylinder and head all on bolted up with rads bolted up and spiggot on.


and the most exciting bit of today is I went and picked these up!
Now these do look clean!
really pleased with the work, while there I took my slide from carb for advice as I couldnt get the needle out, previous owner had rounded it off and it was stuck solid, he managed to sort it and give me a new nut. Not sure of the needle in it but it was on the top clip ive put the jd blue in that I aquired, next will give the carb a really good clean and look what pilot and main are in. I cant recall I think its pilot 40 and main 180. There was some green liquid in the slide indicating some yucky fuel at some point so will be cleaned well.

looking forward to getting it together to start it and check the pv and ride the damn thing!


a bit more putting back together today! Suspension back in and carb has come out, Its going ro get a good cleaning, ive put the jd blue in on clip 3, slide 7. nearly there! More washing needed as can be seen by the cleaned shock in a still dirty swingarm. I wabt to start it but need a new washer for the water pump drain bolt before i fill her with coolant.

Ive ordered a new back tyre today metzeler 6days.
 
Back
Top