Project: 2001 XC300 bare frame rebuild

motogroove

New member
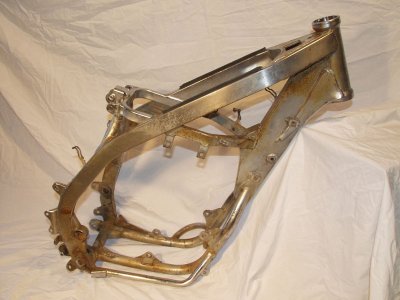
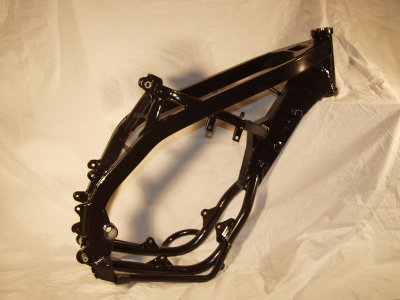
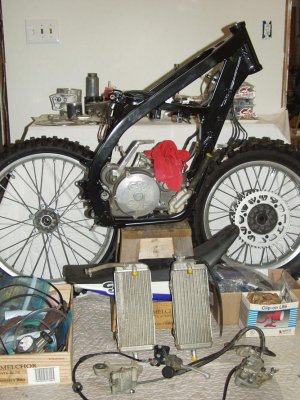
This is at least the fourth time in my life that I've torn a bike down to a bare frame. It is shameful that my nickel plated frame got to be so bad after the years. Put away wet, salt air, just plain poor storage (there's a woman or two involved in that story), the plating had gotten so bad there was no reviving it. The wisdom of the factory's change to powdercoating provided the motivation to do this job right. And so the project began.

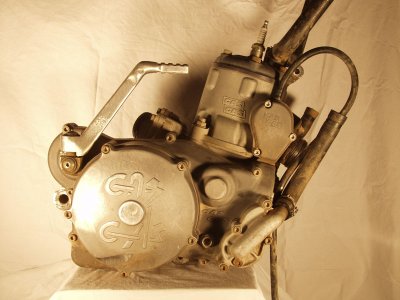
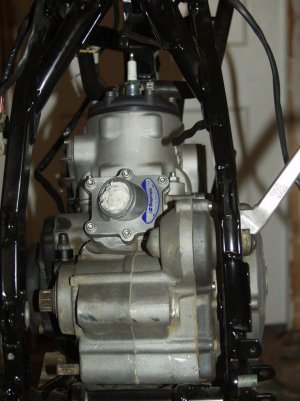
It is out of control now, this project. And it reminds me why people just buy a new bike. But it's a labor of love. I'll dribble photos out of the project as it rolls along. I hope you enjoy.

-Dean
 

Attachments

  • Frame-Bare-Websize.jpg
    Frame-Bare-Websize.jpg
    76.6 KB · Views: 116
  • Frame-Black-Websize.jpg
    Frame-Black-Websize.jpg
    64.7 KB · Views: 123
  • Motor-as-sculpture---Websiz.jpg
    Motor-as-sculpture---Websiz.jpg
    83.3 KB · Views: 117
frame

How hard was it to strip the frame of the nickel ? my 01 is needing a redo also
Stoby
 
frame

I wasnt sure how easy it'd be to sand blast the frame of the nickel
I have a big enough blasting cabinet to fit the frame I just wondered how hard itd be to get the nickel off .Have a friend who does industrial PC. Still on the fence about taking her all apart.
Your frame looks great
 
I wasnt sure how easy it'd be to sand blast the frame of the nickel
I have a big enough blasting cabinet to fit the frame I just wondered how hard itd be to get the nickel off .Have a friend who does industrial PC. Still on the fence about taking her all apart.
Your frame looks great

Thanks.

I'm not sure how tough it was to get off. But then, I wonder if you'd really need to remove good plating. Metal is metal as far as the powder knows. Not that I'm an expert. Your buddy would know.

As far as taking her all the way apart, Mr. Levy warned me not to do it. Because, as we know, they are tight little puzzles. I sort of had no choice. It was either this, or watch it turn to a turd. They are far too lovely to look so forlorn.

Unless you have a backup bike, I'd wait until the off season to do the full tear down, because the domino effect is amazing:eek:. Parts and services take time that could otherwise be used for riding. I'm way behind schedule on my project because I unwisely started remodelling my living room/workshop in the middle of the bike project. The new windows came in yesterday, but they might have to wait.
 
I had my '03 done and it turned out great, but there are a few things you should know.

First, the frame can trap water, from both riding and washing. There are some small vent holes in the tubing that are used as a relief when it it welded at the factory. First thing I did was scrub the frame down good with Simple Green, rinse out these areas as best as possible, and dry the frame on a heat sorce to drive out all moisture. This is important because if there is trapped moisture when the powder is baked, it will blow out these holes and ruin the coat. Make sure everything is completely degreased.

Next I removed all weld spatter with a small chisel.

Use bolts and flat washers to cover the inside motor mount and coil mount tabs so you don't have to sand the PC off later. You can remove the steering head races, but its not necessary. Block the inside of the steering head with large stoppers. These will be removed after spraying and before baking. Coaters that do frames regularly may have their own.

Finally, I let the coater sand blast and clean the frame before coating. He indicated that about half the nickel plating was in poor adhesion, and would have flaked off. What was left was sound and not worth the time to remove.
 
I am thinking about doing this on my 97.. but I really like the way the nickle looks.. the older when clean looks almost like chrome.. and with the bbr subframe it really looks good.. but mine is worn thru in so many spots it really needs a blast and powdercoat..
 
I am thinking about doing this on my 97.. but I really like the way the nickle looks.. the older when clean looks almost like chrome.. and with the bbr subframe it really looks good.. but mine is worn thru in so many spots it really needs a blast and powdercoat..

I seriously considered having my frame replated instead of powdercoated. The nickel plated frame sure did look awesome when it looked awesome. But I remembered how many times I'd pulled parts off the thing, muttering, just so I could polish the frame "like a Harley fag". And once it's worn through, then what? I had to stop the madness.

Incidentally,
as a result of the switch to powdercoat, I felt the need to get the frame guards. They should fit fine with maybe a trim near the master cylinder. It seems that these replace the rubber plugs that go on the swingarm bolt. But I'm not positive that there's not a special rubber plug to go under them. Need to find a picture, or get a clue from one of you.
 
It seems that these replace the rubber plugs that go on the swingarm bolt. But I'm not positive that there's not a special rubber plug to go under them. Need to find a picture, or get a clue from one of you.

Just took apart my 06, and the frame guards do replace the plugs, no other plugs needed than the ones already on the frame guard,

BTW Your frame look awsome, looking forward to see the bike when you're done with it..
 
The nickel plating process is quite harsh to the frame, including the internal areas of the frame tubes. This is due to the acid bath that is neccessary and if not completely flushed is very corrosive. If you like the nickel look, I've seen quad frames stripped to the steel, highly polished, and then clear powder coated. Even a few clear with color tint. A little too much bling for me but to each is own. I did mine in a black/silver hammertone that the guy had a lot of and was cheap, but it looked good too. If you run the frame guards be sure to wrap the frame with tape under them or the powder coat will not last long. Vibration and dirt will make quick work of it, I use the cloth type friction tape.
 
Details...
I wanted a new rubber boot between the manifold and carb, and a new gasket for under the reed block. The boot was just starting to dry rot a little. The original reeds looked great once I cleaned them up a bit. No cracks or other physical wear, and they still lay flat. So, I just left them alone.

While I was ordering...
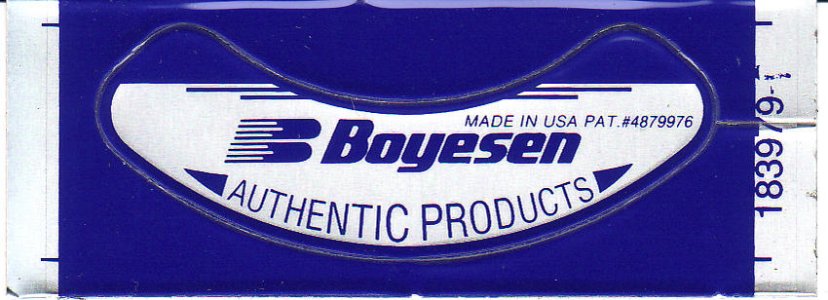
Boyesen was happy to send me a new sticker for the reed block with my order. Don't be afraid to order directly from them. They have a great rider support program that's open to anybody who asks. Prowl their site and you'll find it. Thanks to them for supporting riders at all levels.
 

Attachments

  • Gas-Gas-ass-websize.jpg
    Gas-Gas-ass-websize.jpg
    102.4 KB · Views: 45
  • Boyesen Reed Block Sticker 183979.jpg
    Boyesen Reed Block Sticker 183979.jpg
    71.3 KB · Views: 30
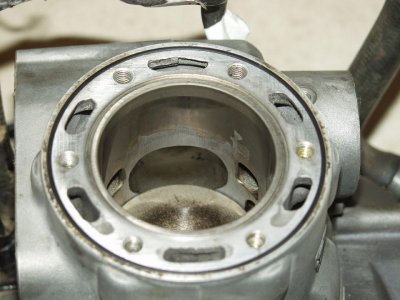
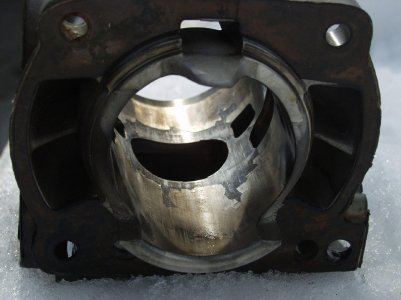
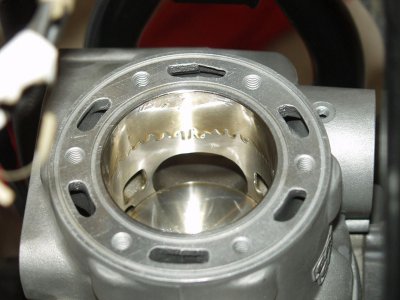
I had been pushing my luck. I never took the top end apart on this bike for nine seasons. Clearly, I didn't ride enough. But that's another story.

Now was obviously the time. She had lost a bunch of crispness the last time I rode her. But I attributed some of that to bumping up the idle screw too much maybe. My best carburetor technique is the hands-off technique.

Anyway, I caught the bad plating just in time before things got even uglier. The piston looked pretty good, considering...

Lancourt was able to replate without any other special repairs (and they can fix some pretty severe damage, I hear). But I was lucky, and they fixed it up nicely. I did need to retap the head bolt holes. As noted about the frame replating, there's a harsh preparation process. I think maybe the etch bath fluffed up the threads a bit. It was an easy thing to clean them up, and there was not significant metal coming out with the tap.

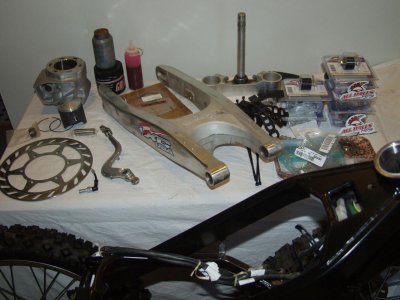
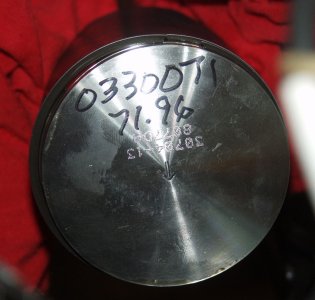
The coated Athena piston was pretty beautiful, like a nice coin from the mint. It was a shame to get fingerprints on it.
 

Attachments

  • bad-cylinder-1-websize.jpg
    bad-cylinder-1-websize.jpg
    120.1 KB · Views: 58
  • bad-cylinder-2-websize.jpg
    bad-cylinder-2-websize.jpg
    112.5 KB · Views: 61
  • assembly-table-websize.jpg
    assembly-table-websize.jpg
    118.2 KB · Views: 58
  • parts-bin-websize.jpg
    parts-bin-websize.jpg
    130.8 KB · Views: 66
  • fresh-jug-installed-websize.jpg
    fresh-jug-installed-websize.jpg
    120.1 KB · Views: 65
Last edited:
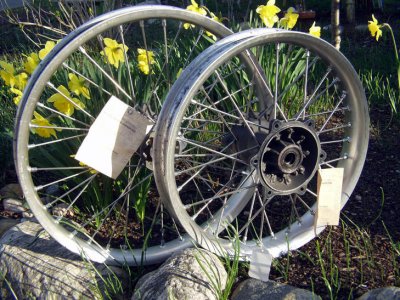
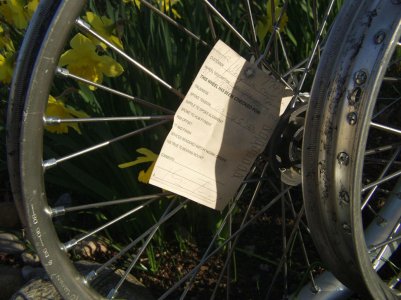
Buchanan's did my wheels. The spoke nipples on my front wheels had turned to rusty barnacles. The rear spoke nipples must have been better quality as they did not turn so badly. But they too were siezed, and much of this work is just to clean up age and weather issues. Things should match, so I sent the set out for rebuild.

Stainless spokes with "blue zinc plated nipples". I'll admit I thought I was ordering some cool blue anodized looking things, for a slight bling factor. But I learned that blue zinc plating compares to yellow zinc plating the way a cold white compares to a warm white. No big deal. They look clean and that was the big goal. Maybe I'll swap nipples over next winter if I feel the need to express myself.

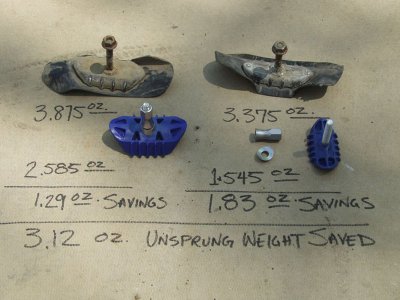
Motion Pro LiteLock rim locks. Better in every way. Full review to be posted elsewhere tomorrow. I'll post a link. Spoiler: get a set with your next set of tires.

Edit: Note the egg-shaped rim lock hole in my rim (middle photo). I filled that with JB weld and drilled a new spot that is similarly referenced to the valve stem hole. I used tape on the outside of the rim and let the JB weld make a flat mushroom head on the inside. The egg-shaped hole happened when I forgot to tighten my rim lock. 15 minutes of practice at Southwick did that damage. See the Southwick Stimilon Spam thread for the full story.
 

Attachments

  • wheels-done-websize.jpg
    wheels-done-websize.jpg
    140.5 KB · Views: 46
  • Buchanan-ticket-websize.jpg
    Buchanan-ticket-websize.jpg
    125.7 KB · Views: 46
  • LiteLock-websize.jpg
    LiteLock-websize.jpg
    100.8 KB · Views: 47
Last edited:
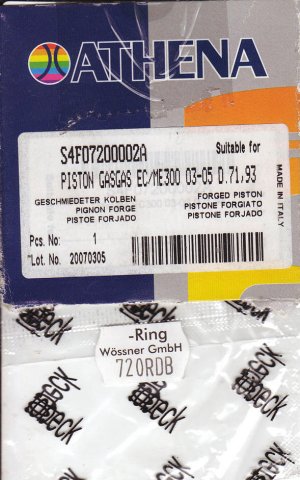
Athena trivia and markings from Langcourt
 

Attachments

  • Athena-Label.jpg
    Athena-Label.jpg
    118.3 KB · Views: 39
  • Athena-crown-websize.jpg
    Athena-crown-websize.jpg
    110.2 KB · Views: 43
Here's an interesting manufacturing archeology mystery. One of my top motor mounts is a little bit shorter than the other one. So, either the factory corrected it by extending the oval hole, or the bike corrected it over time.
 

Attachments

  • Top Motor Mount GG QC NG LOL.jpg
    Top Motor Mount GG QC NG LOL.jpg
    120.2 KB · Views: 31
Are you going to be ready in time for ISF '11?

Is that Dave S.?

Actually, I need to be ready in 12 days. A day of practice to shake it down before Southwick would be nice.

ISF would be a lot of fun to do again. I'll dig up some nostalgic photos.
 
Maybe not that Dave S., but a Dave S. that posts on RMD from time to time. I've yet to make an ISF. There's always next year...

Dave Smith
 
Great thread keep it coming.
Before you put your tires on are you considering adding weight to offset your rim locks? Makes a huge difference at higher speeds.
thumbsup.gif
 
Back
Top