You are using an out of date browser. It may not display this or other websites correctly.
You should upgrade or use an alternative browser.
You should upgrade or use an alternative browser.
Project: 2001 XC300 bare frame rebuild
- Thread starter motogroove
- Start date
motogroove
New member
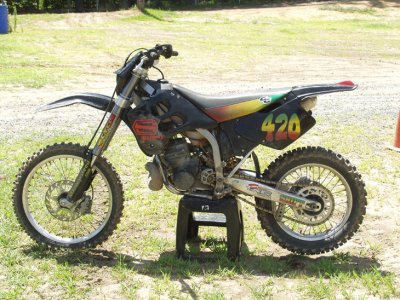
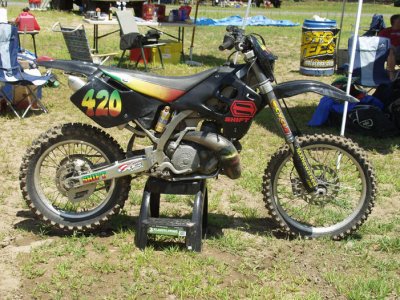
Here are a couple of before pictures from last year's Stimilon Motocross Challenge. The livery and number change was inspired by my slick gear from last year's sponsor. This year's sponsor may be different, as my contact has moved onward. I have one iron in the fire that would inspire some fun livery. Goofy bikes and goofy riding gear is part of what makes this goofy race so special. I hope nobody is offended. 
Wad of sand is from the Southwick Stimilon story found elsewhere.
Eleven days until the race. I hope we get the rain done by then.
-UFO KX plastic on the rear. Modified (defeated) quick access airbox panel. It's either that or trim the KX panel and try to make it fit together. I picked up a replacement panel on ebay, so I can go back to quick access blue.
-UFO late model RM fender up front
-Krylon Fusion on the ratty old radiator shrouds and my headlight.
I'm probably stuck with black plastic this year. Time and funds are hitting the wall.
Full stealth, with the black frame now.
Attachments
Last edited:
swazi_matt
Active member
Great thread keep it coming.
Before you put your tires on are you considering adding weight to offset your rim locks? Makes a huge difference at higher speeds.
or go tubliss?
Jim Cook
Platinum Level Site Supporter
I'm not positive that there's not a special rubber plug to go under them. Need to find a picture, or get a clue from one of you.
There are rubber plugs to go in the holes on the underside of the swingarm. They should be readily available. If not, let me know. I still have some in my stock of parts.
Great looking frame you have there!
Good Riding and Wrenching!
Jim
Jim Cook
Platinum Level Site Supporter
Motion Pro LiteLock rim locks. Better in every way. Full review to be posted elsewhere tomorrow. I'll post a link. Spoiler: get a set with your next set of tires.
I second that on the new Mo-Pro LiteLock rim locks. With them, I can now do like I used to and tighten the rim locks until they squeak.
Good Riding!
Jim
desertgasser300
Banned
Can't wait to see the end result, should be very nice!
motogroove
New member
There are rubber plugs to go in the holes on the underside of the swingarm. They should be readily available. If not, let me know. I still have some in my stock of parts.
Great looking frame you have there!
Good Riding and Wrenching!
Jim
Hi Jim!
My bike has 3 rubber ones and the one closest to the front sprocket seems to be a harder material, like the chain slider material.
Looking for a new chain slider BTW...
I got my linkage and swingarm all pressed together.
Jay's method of pressing the stem out of the 3xclamp (in order to remove the lower steering bearing) does not seem to be working without excessive force. I'm pausing for lunch to ponder the situation.
motogroove
New member
Hi Jim!
<snip>
Jay's method of pressing the stem out of the 3xclamp (in order to remove the lower steering bearing) does not seem to be working without excessive force. I'm pausing for lunch to ponder the situation.
All set pressing the stem out. Gotta go out the bottom.
The press sure does make things civilized.
Almost done with all my chassis bearing work.
tick, tock...
motogroove
New member
I have always used a cuttoff wheel to carefully cut most of the way through the race and then break the remainder with a cold chisel.
Me too. This was the first time I've had a press for any of this work. I always had to do it the primitive way. But I was always muttering something about how this couldn't be how the pros do it.
I'm pretty happy with how easy it made everything. I was battling some poor build quality on my brand new Harbor Freight press. The most important part that contacts the work is off square by many degrees. There's no way quality control could miss that, so I must assume that there's simply no quality control at the slave labor factory where they are made. I'll have to have my buddy reweld it.
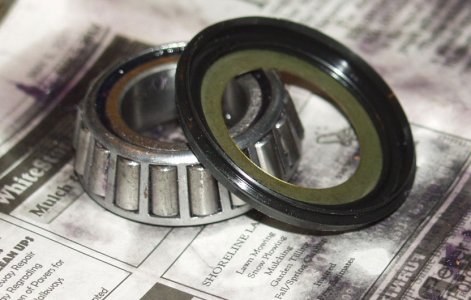
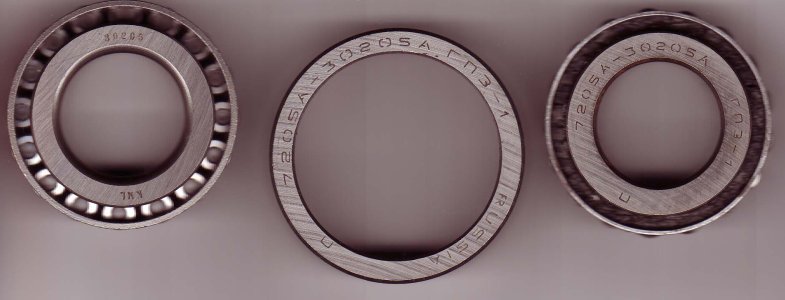
The All Balls steering bearing kit comes with two nice seals (one shown with an old bearing) that are not on the bike as delivered. Now what, I asked myself. The bottom setup from the factory looks more like shims than any kind of seal, so I used one of the new seals down there. Up top, the O-ring does a good job, so I didn't want to get redundant and add a bunch more friction. The bottom seal might add a little friction. But if I'm dreaming about a steering damper, that shouldn't bother me too much.
Attachments
motogroove
New member
Backing up to installing the cylinder...
Motion Pro makes two great tools for torquing cylinder studs.
http://www.motionpro.com/motorcycle/tools/category/torque_setting/
But the simple one fits only 12 and 14 mm nuts, and the universal adapter was a little pricey for as often as I'll use it. Maybe some day I'll have one.
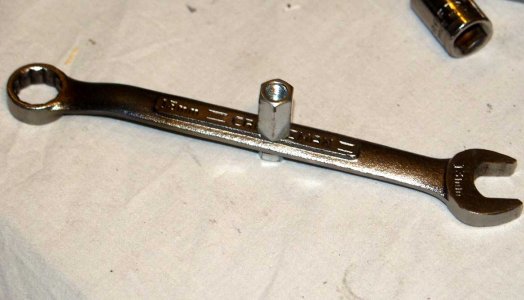
I made my own tool. I'm not sure how important it was for me to get the wrench in the plane of the bolt, but I did. I put a bolt through the bench, clamped a couple flange nuts in the box end of the wrench so I wouldn't distort the box, and heated her up until a gentle tap would bend her. The threaded coupling gives a nice firm seat for a socket on your torque wrench. Titanium bits had no problem drilling the Craftsman tool steel.
Like the Motion Pro tool, the tool extends the torque wrench 3 inches. I was able to use the instructions for the MP tool to do my math and adjust the torque value. You have to do the math yourself because you need to measure your torque wrench length. And your torque wrench might be a different length than mine is. Directions here:
http://www.motionpro.com/motorcycle/articles/view/860/torque_wrench_adapter/
The best part for me was that 300 in/lb was just out of range of my in/lb wrench. The extra 3 inches brought my spec down into the wrench's range. Double excellent!
Attachments
motogroove
New member
I will be making one of these torqe wrench extensions for sure. When measureing the length of the torque wrench, is it measured to the center point of the handle or the very end? It would seem the middle by looking at the diagram.
Yes, I used the middle of the handle area as my length.
GasGas
New member
I just use a hex driver on the torque wrench across a box wrench and calculate the torque. I ground a box wrench slightly just for this application as a standard one will usually not fit over the nut/stud and hit the cyl casting.
Smart. So you are using the full length of the wrench?
motogroove
New member
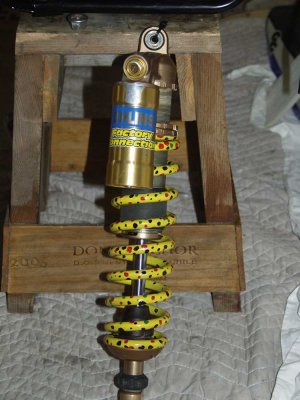
Goofy bikes and goofy riding gear is part of what makes this goofy race so special.
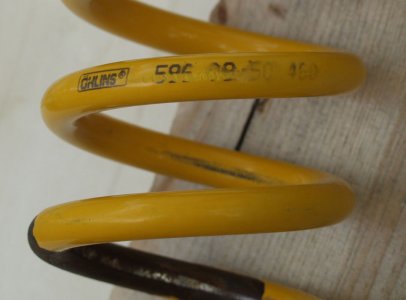
Well, my paint on my shock spring was failing. My new spring is on backorder for a few weeks. Perfect excuse to get some goofiness on the bike.
One week from tonight I'll be partying in the pro pits at Soutwick. This just in:
Dont miss out!
I love how we have had pre entry open for 5 months and today alone more entries have come in than in the last 30 days combined - oh well...
Honestly stoked those of you can make it - the rest - we would love to see you
Reminder - Pre entry get you:
A cold Narragansett Friday night at check in (be ready to prove to the nice officer that you are indeed 21 - we are cool, but not that cool minors - ha!)
A coupon for $10 off any Oakley Product (Stimilon Shop sponsors can redeem 100% with Oakley)
A coupon for $10 off any Twin Air Product (Stimilon Shop sponsors can redeem 50% with Twin Air)
A coupon for 25% off any Answer, MSR and/or Pro Taper Product (Stimilon Shop sponsors can redeem 100% with Tucker Rocky)
Other cool goodies you will just have to wait and see..
We will be taking entries the day of for all of you last minute slackers. Info will be on the web site by Monday
I will also send a follow up email to all regarding gate times, additional activities, race order and other stuff you probably wont read.
Pre registration closes tonight at Midnight - all the info, details, and secure online signup is at www.stimilon.com
Have a great weekend
davo
--
David Olcott
davo@stimilon.com
www.mastersofmini.com
www.stimilon.com
Stimilon
Events for those who want to have fun
Attachments
motogroove
New member
I just use a hex driver on the torque wrench across a box wrench and calculate the torque. I ground a box wrench slightly just for this application as a standard one will usually not fit over the nut/stud and hit the cyl casting.
Perfect.
That would've been too easy though.
jhendr3702
Silver Level Site Supporter
Perfect.
That would've been too easy though.
hey moto.. what rear spring are you waiting on ?? my 01 had a white 4.8kg which would not cut it for me .. pretty sure i still have it..
if it will help you, let me know..
jay
motogroove
New member
hey moto.. what rear spring are you waiting on ?? my 01 had a white 4.8kg which would not cut it for me .. pretty sure i still have it..
if it will help you, let me know..
jay
I'm not sure what rate they specified for me. Could be just what the stock one was. I have not bothered to figure out these numbers.
But in any case, they've already placed the order and loaded the spring on a slow Viking ship from Sweden. But thanks for the offer!

