Proper Way to Cut a Chain

mlyle11

New member
This may be already answered by wise Jakobi, but none the less, thanks in advance for reading and commenting.

I would like to know the proper way to cut a chain. I see "cutting" referenced here many times, and always like and excuse to buy a new tool, but a chain breaker and press runs around $110 (DID).

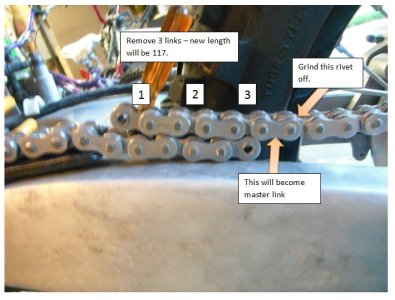
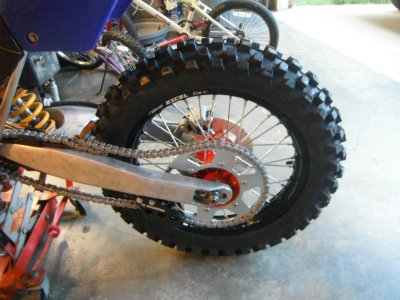
I am running an ironman 13 front, JT 52 rear, and an RK 520 EXW 120 link chain. It looks like I need to remove 3 links to be in the middle of the adjustment range. What is the proper method?

1. Buy the tool, press it out. (Need to to wait till Tuesday if so)

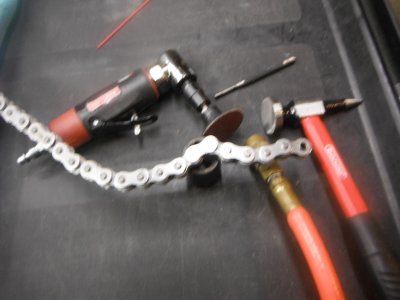
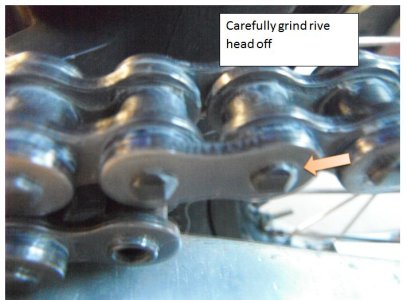
2. Use a grinder to carefully remove the pin and press it out. (I already have air and electric grinders, and feel I can carefully do this.)

The chain instructions also reference using a press tool to install the master. They say not to use vise grips (gee what about duct tape). I have read where others have left out one side of the O-rings because it is too hard to properly install the clip.

I am ok to wait, but sure would like to run this thing up and down the block tonight, annoy some neighbors and kill some skeeters!

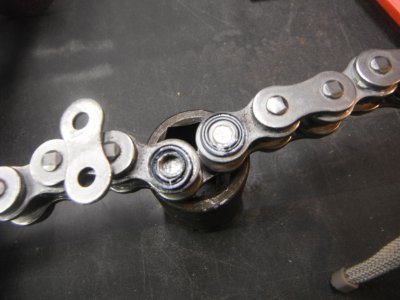
Attached are pics of the chain and my thoughts on where to cut and grind, and a shot of the new rear wheel set! Front is on next!
 

Attachments

  • chain1.JPG
    chain1.JPG
    66.1 KB · Views: 36
  • chain2.JPG
    chain2.JPG
    58.7 KB · Views: 144
  • DSCF1989.jpg
    DSCF1989.jpg
    119.8 KB · Views: 45
See paste below from Jakobi...


Paste this in your other thread :P

No dramas with the grinder. Grind the face plate until you're down to the pins and use a punch to drive them out. If its on the bike best to work around the rear sprocket as it'll hold the chain for you. If doing it to set the new chain length remember the age old, measure thrice. Cut once!
 
Your pics look on the money and still give you good adjustability to factor in chain tension both ways. Remember the chain may stretch initially too.

With the pic below make sure you grind the plate right back where both pins are and drive the pins one hit on each at a time. It will push the entire back plate with pins connected out.
attachment.php


From there you can install the master link. Make sure your kit includes one with the retaining clip. If it has a press fit clip you will need the tool to press the pin tops. I used a small C clamp with a small (8mm/10mm) nut over the pin and used this to slowly press the face plate back on to the pins. You want it pressed down enough to allow the retaining clip to slide on, but not so tight that the links bind. I would not recommend leaving out any of the o/x rings.

With pics - http://www.dirtbikemagazine.com/Me2...0&tier=3&nid=1C6684AA99CA4CE4B87F9F16F92285D1
 
referencing the arrow in picture #2, you'll also need to grind the pin just to the left to get the plate off. You should have a separate master link. I use pliers and a small nut over the m/l pins to set the plate, in my experience they'll fit snug enough to install the clip. Unless you're doing the link less type and you will need the rivet tool
 
Fred - I have the master link type chain, so no need for the rivet tool. Thanks for reminding me to grind them both, some how my brain was going after only one!
Jakobi - Thanks for the awesome link to dirt rider. That is a perfect demo of how to do it!
I am grinding away now. Also nice to note I mispelled rivet! Riv, Rive, Rivet... they all the same!
 
We knew what you were saying. Take note to what myself and Fred said about the small nut. It'll help immensly when you get to pressing the face plate back on the master link :) That was the hardest part when I did mine the first time. Couldn't get it to push on any other way.

PS those new hubs look orange, and that new rubber looks as nice as new rubber always does!
 
if your going to be in this game for long buy yourself a chain breaker kit. I got one from motion pro years ago ... nice little tool to have around.
 
i have 2 chain links, (outside plates) that i took the rivets out of, and enlarged the holes slightly.
i use these as my chain press spacer for pliers, g clamp etc. (before i brought a chainbreaker/press)
i found i had too much trouble trying to press chains together one side of a link at a time.
 
The outer plat is going in the bin, grind off the two outside pins on the plate and drive a flat blade screwdriver between the inner link and the outer plate. It's garbage, treat it as such. I have found that if you grind off one pin and try to press/drive out that single pin, it's more trouble than it's worth. Grind off the outer pins until they are just below flush and wedge the plate off. You will damage the o-rings, but that's why the master link always comes with its own o-rings.

To install the outer plate, I use a 6mm or 8mm box end wrench over the pin and a large pair of water pump pliers (channel lock style) or vise grips. If you have a small c-clamp that is even better. Put the box of the wrench over the pin and press away. Use the clip to gauge how far to press the outer plate. Once the clip fits into the groove on both pins, install and be done.

I can post pics tomorrow with some spare chain if you wish.
 
All together, everything went as planned. Used my angle die grinder (air) to grind down the pins and the link. Then to drive the pins out, I used a spring loaded center punch to start a "ding" in the center of the pin, which was a little hard to see at first as the grind made it all shiney. Then I used an old punch that had been ground to a point. It started easier than trying to get a flat face punch going. A few whacks later... FREEDOM.

For install, I ended up doing as lonetree recommended. I used the link I ground down to place over the master link and pressed it with a small C clamp. That seated the link fully and allowed me to easily install the master clip. The small nuts would work as well, but I was fresh out! Plenty of big nuts laying around :)

I do think I will invest in the chain tool, as I have 4 bikes to maintain. Sure was fun to send sparks around the shop though! I didnt get the bike going yet, but at least I annoyed the neighbors with griders, air compressors, sparks, and a few wacks of the hammer. Oh, and I had the Zeppelin cranked a little loud!

Attached are some pics of the process...
 

Attachments

  • doomtools.jpg
    doomtools.jpg
    113.7 KB · Views: 31
  • ground _down.jpg
    ground _down.jpg
    115.3 KB · Views: 30
  • freedom.jpg
    freedom.jpg
    114.4 KB · Views: 26
After grinding the pins down, this is what I use to push the pins out.
BM-CB-001_is


For master links with a clip, I use this to press the link on.

BM-CPT-001_is
 
once you have your new master clip plate and clip on and in place, don't forget to gently tap the pin ends to lock the spring clip tight to the plate behind it.
 
Back
Top