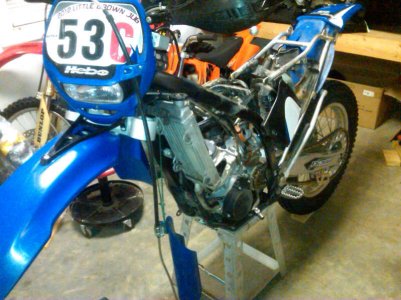
I had been experiencing poor low end performance on my 2011 Gas Gas EC250. I jetted the bike but the performance continued to be bad and actually degrade. Along with the degradation of low RPM power I noticed an increase in a rattling sound. The sound occurred at idle only and was not the chain. I ruled out the clutch as the sound was present with or without the clutch engaged. I decided to investigate the Power Valve system. Below is what I did to fix the issue. I am not a Gas Gas Mechanic. Please consult your manual or a qualified mechanic. I am not responsible. I am merely offering what I did to fix my issue. Your mileage may vary. (Some pictures are mine and some from the internet).
1. REMOVE EXHAUST EXPANSION CHAMBER
? Mine had two mounting screws on the pipe connecting to frame via brackets
? Also remove the 2 springs holding the pipe on to the front of the cylinder.
2. DRAIN COOLANT
? Open the drain screw on the right hand case.
? Safely discard and use fresh for reassembly.
3. DISCONNECT COOLANT HOSE
4. DRAIN OIL
? This is not necessary if you choose to lay your bike over on its side
? I choose to drain my oil and do the work on the kick stand. (I change oil often anyway)
5. REMOVE KICK STARTER
? There is a small bolt on the face side.
? Make note of the orientation of the lever so you can re assemble the same way.
6. REMOVE THE SIDE CASE
? You will need to remove 2 long screws from clutch cover as they go all the way through
? You may need to disconnect brake pedal from rod as well.
? I removed the small case over the coolant impeller and the impeller also. This may not be necessary.
? Take your time here. You do not want to pry off the side case with a screw driver and mess up the case. You may end up with sealing issues later on. There are 2 guide pins that force you to take the case off straight out.
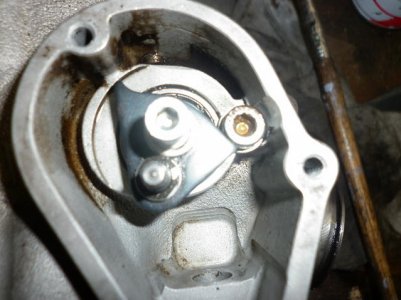
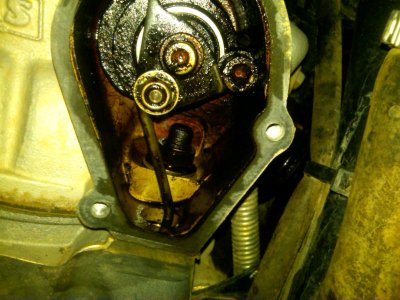
7. ASSESS THE POWER VALVE
? The actuator plate should be solid against the stop bolt while the bike is idle.
? Also note the actuator connecting rod for clearance against the case opening at the bottom of the power valve chamber
? DO NOT move the power valve assembly through its full range of motion. The governor has 6 ball bearings that are held in place by the power valve spring applying back pressure. You run the risk of creating a gap in the system and having all the ball bearings fall out.
8. ADJUST IF NECCESARY
? If your actuator place is not ?against the stop? at idle you need to adjust. This means that that the power valve ?flapper? is not fully closed when it should be. The results in low RPM power.
? Take care to understand how it all connects before you loosen anything.
1. Loosen the set screw until it no longer holds the shaft in position. Note that everything can easily fall apart at this point. So use both hands and take your time.
2. Rotate the entire bell crank, rod and actuator plate until the plate is against the stop and re tighten the set screw. If you cannot rotate far enough for the plate to hit the stop, examine the rod and see if it is binding on the case opening.
? If the rod is binding against the case, you will need to disconnect the rod and do some careful bending.
1. There are 2 nuts that need to be removed. One on the actuator assembly and one on the end of the bell crank. Take your time and do NOT use air or electric tools. The post on the actuator plate can be fragile. Some people will slightly heat up the nylon inside the nut to make it easier to loosen.
2. Once the rod and bell crank are out you can make your bends. Be very patient and make very small bends. Test the fit after each slight bend until you have it to where the rod never touches the sides at all throughout the full range of motion and the actuator plate rests against the stop. NOTE: Being that the rod and bell crank are not connected to the main power valve governor, there is no risk of the ball bearings falling out
9. PREPARE FOR REASSEMBLY
? Clean off all the old gasket material
? Make sure there is no coolant in the engine case
? Add the case gasket to the case and rest on the two guide pins
? Slowly push the case back on. Note that you must put the case on very straight. There is a low tolerance on this fit. Do not try to force it. Take your time and it will seat.
? Replace bolts and torque to spec a little at a time. Use the attached picture to help determine which bots go where. Image was obtained from Gas Gas Riders Forum.
? Reconnect exhaust, coolant hose and brake lever
? Add oil and coolant to manual specs.
Here is a PDF of this all.
http://skramnor.com/FILES/pixforpostings/2011gasgaspvtutorial.pdf.


