You are using an out of date browser. It may not display this or other websites correctly.
You should upgrade or use an alternative browser.
You should upgrade or use an alternative browser.
Newer Plastic on Older GasGas show your bike
- Thread starter tazzer
- Start date
roostafish
Gold Level Site Supporter
Holy crap tazzer. That thing is sharp. I wouldn't change it.
roostafish
Gold Level Site Supporter
Kx plastics from the late 90's bolt rift up to the early Gas Gas. If you look closely, the stock airborne mud flap says Kx right on it.
Weskusklong
New member
Does Any body know what newer plastic will fit my MC250 '99 it is realy looking tired
Look at motoxmatrix.co.uk
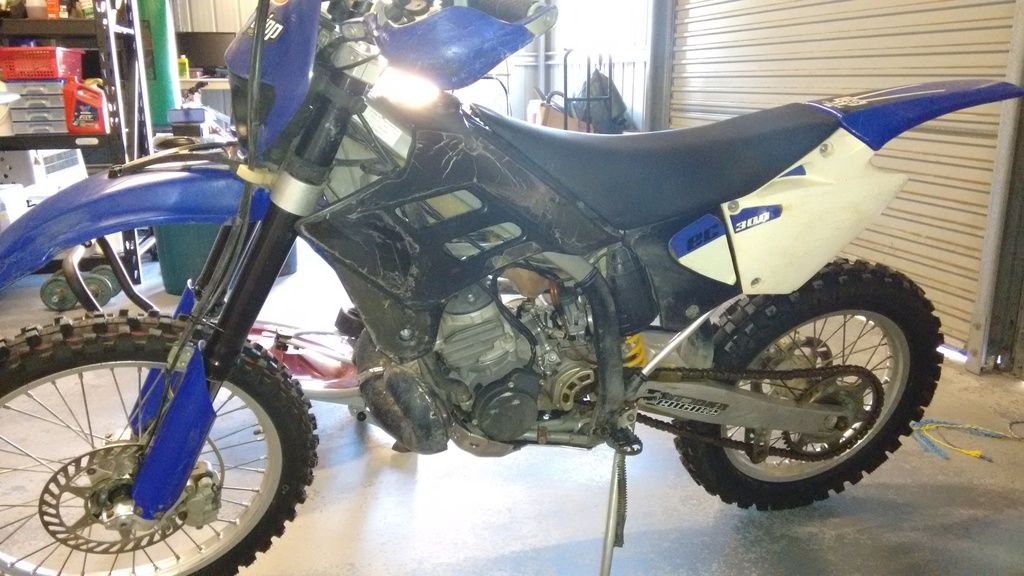
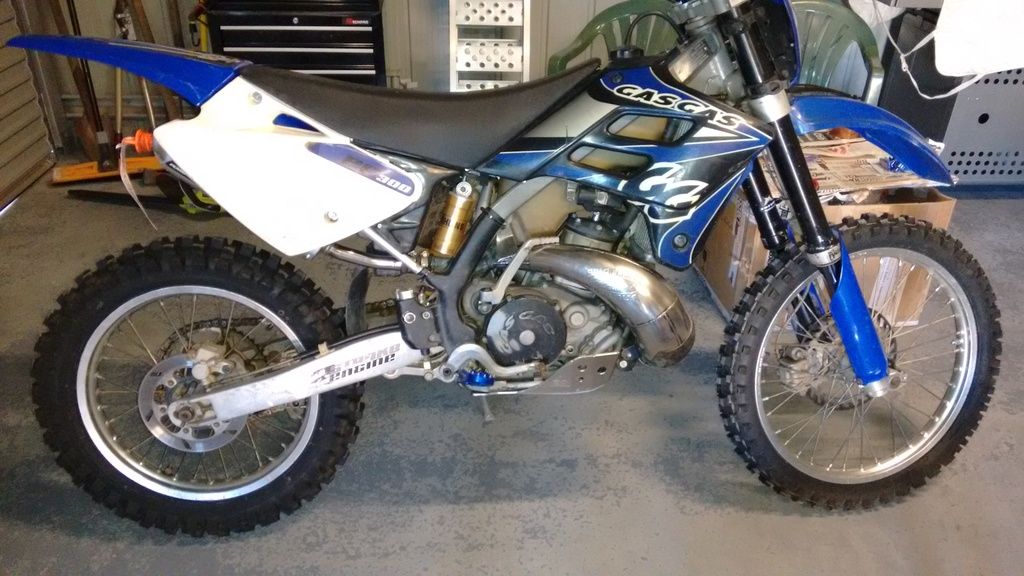
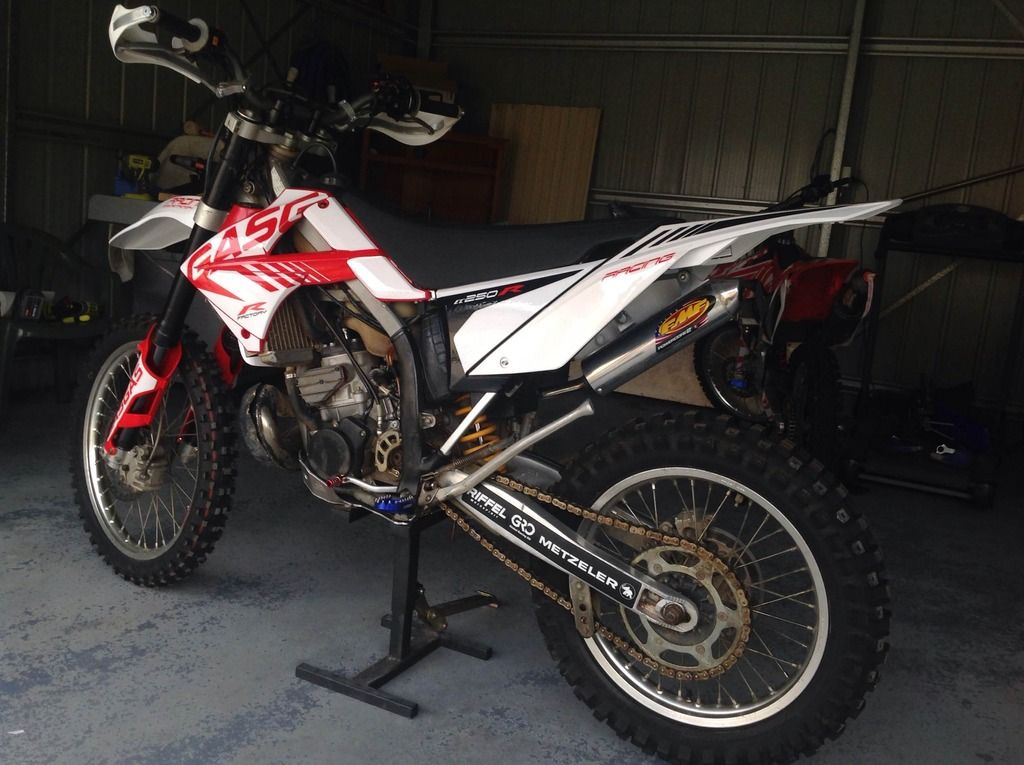
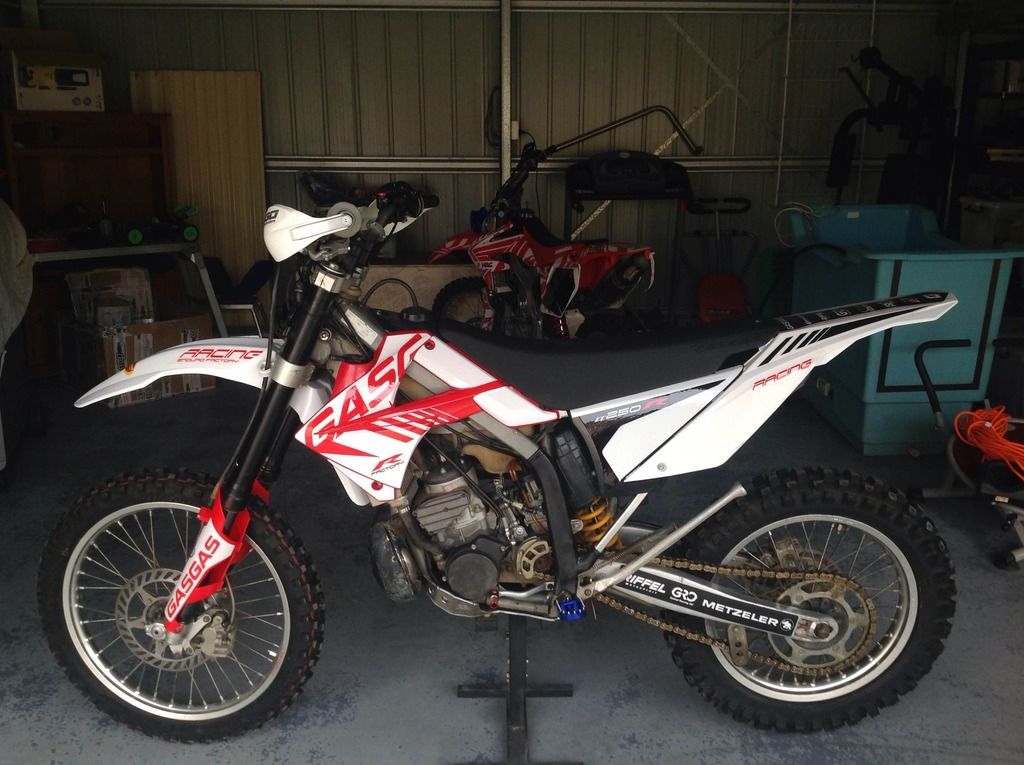
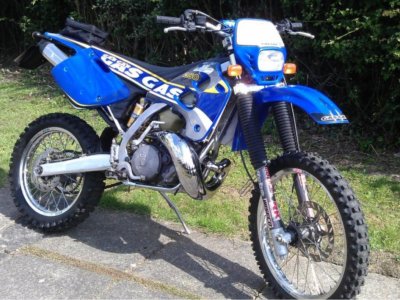
As Promised Here are a couple of Before Photos
Where did you get those plastics and graphics? They'll fit an 01 EC 300, more or less?
This is where I got my Transformation kit from ( the kit gets less in it every time I look)
http://www.motocrosscenter.com/ecommerce/product_info.php?cPath=667_668_520&products_id=2899
Beware though, my experience with their after sales rectification leaves a lot to be desired.
Alan
http://www.motocrosscenter.com/ecommerce/product_info.php?cPath=667_668_520&products_id=2899
Beware though, my experience with their after sales rectification leaves a lot to be desired.
Alan
Great work BigAl.. Looks awesome mate..
How was the fitment process? Any hurdles etc to keep in mind.. Be lovely if u had documented it somewhere.. ;-)
PS if you have any parts u are looking to move on hit me up.. I like to hoard shit for a rainy day...
Hi Roosta, Thanks, Still not quite finished yet, needs a few more bits fitted and tidied up. I have somehow ended up with a few bits left over, nothing critical(I Hope
Unfortunately you are a bit late for the 2005 parts another member pm'd me a month ago, sorry.
BigAl, I have that kit now and you were definitely right about the subframe and plastics. I had myself convinced they used a totally twisted frame to build the kit off of, but it's on there now.
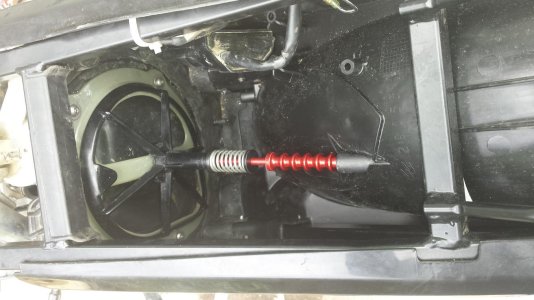
I have one question only, how does the front fender attach to the lower triple? The kit doesn't come with the front light anymore, and I'm wondering if the light is required to use this new system with the red aluminum rod/spring thing. I assume that's only to hold the light in place and in no way secures the fender itself.
Basically, as it is, with the small bit of plastic bolted to the top of the front fender, it looks like I'd have to drill holes through the front of my lower triple to get a total of 4 bolts holding the thing on. Does this sound right to you?
BigAl, I have that kit now and you were definitely right about the subframe and plastics. I had myself convinced they used a totally twisted frame to build the kit off of, but it's on there now.
I have one question only, how does the front fender attach to the lower triple? The kit doesn't come with the front light anymore, and I'm wondering if the light is required to use this new system with the red aluminum rod/spring thing. I assume that's only to hold the light in place and in no way secures the fender itself.
Basically, as it is, with the small bit of plastic bolted to the top of the front fender, it looks like I'd have to drill holes through the front of my lower triple to get a total of 4 bolts holding the thing on. Does this sound right to you?
I believe the front fender just bolts into place with the original 4 bolts and collars off the old F/fender. The red rod spring and 2 collars is the air filter mount, still have not worked out how that secures the air filter? maybe some one can enlighten us both?
desertgasser300
Banned
I believe the front fender just bolts into place with the original 4 bolts and collars off the old F/fender. The red rod spring and 2 collars is the air filter mount, still have not worked out how that secures the air filter? maybe some one can enlighten us both?
read thru this thread it is in here on a page about the air filter spring with a picture.
I believe the front fender just bolts into place with the original 4 bolts and collars off the old F/fender. The red rod spring and 2 collars is the air filter mount, still have not worked out how that secures the air filter? maybe some one can enlighten us both?
BigAl, looks like we need parts 8, 13 and 11 to make this thing work. If I read right, you already bolted the old airboot onto the new airbox, and I've done the same. Seems to work good enough but man, I cut my hands to shreds on that sharp metal and seemed to have a hell of a time lining everything up and drilling holes and then bolting it down, but it's on there for good now. I used a C-Clamp and wasn't able to use the old welded on studs. They just weren't long enough to start the nut. So I drilled those out and bought all new M5 hardware with washers to secure the airboot.
Take a look here, these are the parts to make the airfilter device work. http://partsfinder.onlinemicrofiche...asgasdb&a=90&b=19&c=0&d=2011 EC250 AIR FILTER
Still looking into the airboot hitting the rear shock. I don't think it's critical, but it does touch and pushes the plastic bit that snaps onto the frame off of the frame a bit, which will probably cause some headache while installing the seat which snaps over/under that plastic, further pushing the boot into the shock.
Also, the front fender I received only had two holes that lined up with the holes on the bottom of the triple clamp. I ended up just drilling 2 holes where the front two bolts go through the fender. If I don't figure out what that crazy little device bolted to the top of the fender is for, I'll drill two holes into the front of my triple and run some bolts through the front of it. Talk about over kill!
One last question, how are you securing your ECU(?) box? I ran all the wires along the right side of the frame (they were on the left side factory) and through the hole in the airbox and now the ECU is just kinda hanging out in there unsecured.
Last edited:
desertgasser300
Banned
BigAl, looks like we need parts 8, 13 and 11 to make this thing work. If I read right, you already bolted the old airboot onto the new airbox, and I've done the same. Seems to work good enough but man, I cut my hands to shreds on that sharp metal and seemed to have a hell of a time lining everything up and drilling holes and then bolting it down, but it's on there for good now. I used a C-Clamp and wasn't able to use the old welded on studs. They just weren't long enough to start the nut. So I drilled those out and bought all new M5 hardware with washers to secure the airboot.
Take a look here, these are the parts to make the airfilter device work. http://partsfinder.onlinemicrofiche...asgasdb&a=90&b=19&c=0&d=2011 EC250 AIR FILTER
Still looking into the airboot hitting the rear shock. I don't think it's critical, but it does touch and pushes the plastic bit that snaps onto the frame off of the frame a bit, which will probably cause some headache while installing the seat which snaps over/under that plastic, further pushing the boot into the shock.
Also, the front fender I received only had two holes that lined up with the holes on the bottom of the triple clamp. I ended up just drilling 2 holes where the front two bolts go through the fender. If I don't figure out what that crazy little device bolted to the top of the fender is for, I'll drill two holes into the front of my triple and run some bolts through the front of it. Talk about over kill!
One last question, how are you securing your ECU(?) box? I ran all the wires along the right side of the frame (they were on the left side factory) and through the hole in the airbox and now the ECU is just kinda hanging out in there unsecured.
You dont need parts 8 and 13, those are restrictor plates for maybe euro standards? Even says what they are in the link you posted.
The front fender mounts differently on the later models. Drill and tap two holes in the front of the lower triple and mount the fender support to it then bolt up the front fender. Two in the back in the triple underneath two in the front on the support bracket. Not really overkill just a different way to mount it.
As for the ECU find a way to mount it to the inside of the airbox. Later models have a bracket for it. the older models that have the conversion, you need to make something up for it. be creative or just zip tie it to the inside of the frame in the airbox?
I only meant it would be overkill because I'll have a total of 6 bolts holding it on if I drill the lower triple, which is more than any other piece of plastic on the entire bike.
As for the airboot hitting the shock, I'm afraid I'm going to have to unbolt it and rotate it significantly away from the shock. It lines up with the carb very nicely where it's at so I'm considering just melting it.
Ok, screw everything I said about that filter retention device. It's really simple. Here's a picture of the device in action. Sorry for the dirt, I do all my work outside
Attachments
Last edited:
desertgasser300
Banned
I only meant it would be overkill because I'll have a total of 6 bolts holding it on if I drill the lower triple, which is more than any other piece of plastic on the entire bike.
As for the airboot hitting the shock, I'm afraid I'm going to have to unbolt it and rotate it significantly away from the shock. It lines up with the carb very nicely where it's at so I'm considering just melting it.
The more I look at that microfiche the less I understand it. Part 11 comes with the kit, you get two of them. They're plastic "mollies" with a plastic screw. So, however that thing secures the airfilter is truly a mystery. I'm wondering if someone with a 2013 or newer GasGas can show us how this thing works?
Looks like two clips to hold pieces 8 and 13 together, the two you don't need. Toss them aside.
Over here where it's legal to ride on road the older ones fit in mine attached 2000.
Parney, that is exactly how my bike looked before I tore into it. It was in pretty sad shape though. I was bummed when I couldn't find that exact seat cover, so opted for the upgrade kit instead of going original.
Ok said:Thanks for the photo of the air box retention device, more than a little embarassed I didn't figure that out.
Thanks for the input DG300
Going to get a new air boot and front to the air box and re do it, mine is way butchered compared to yours GGRider01
Last edited:
I had a real bastard of a time to be honest. It looks like I've been playing Patty Cake with Edward Scissorhands.
I ended up riveting the front airbox plate to the rear, larger portion of the airbox before sliding it onto the subframe. I placed 3/16 inch rivets through the little tabs that overlap the rear section. Then attached the subframe to the bike as one whole unit, rear fender and all. I had to wrestle every last piece into place every step of the way. I am going to ride this bike until it turns into a pile of dust before I ever strip it down to pieces again.
I ended up riveting the front airbox plate to the rear, larger portion of the airbox before sliding it onto the subframe. I placed 3/16 inch rivets through the little tabs that overlap the rear section. Then attached the subframe to the bike as one whole unit, rear fender and all. I had to wrestle every last piece into place every step of the way. I am going to ride this bike until it turns into a pile of dust before I ever strip it down to pieces again.
Similar threads
- Replies
- 6
- Views
- 1K
- Replies
- 8
- Views
- 3K
- Replies
- 6
- Views
- 4K
- Replies
- 6
- Views
- 5K

